
It’s no secret that Godaddy has been getting more complaints in the past few years regarding the quality of their services in addition to their expensive prices when it comes to charging for all their products, and that includes Domain names, Emails, Privacy domains, SSL certificates, etc…
Compared to its competitors, they offer affordable prices. Luckily, Bluehost does that, and they offer some of these services for free.
In this tutorial, we will see how to transfer domain from Godaddy to Bluehost.
How to Transfer Domain from GoDaddy to Bluehost
Before you start on your domain transfer from Godaddy to Bluehost, you must meet the following requirements so you can be able to proceed with the transfer:
- The remaining time in your domain name’s expiration date must be more than 15 days.
- The first registration date of your domain name is more than 60 days ago.
- You can transfer your domain from Godaddy to Bluehost only if it has one of these extensions: com, net, org, info, co, us, and biz.
Part 1: Download your websites files from GoDaddy
First, we need to back up all our website files and databases, so we can safely migrate them to Bluehost. Here is how to do it:
Step 1: Export your files
1. Go to your cPanel in Godaddy, and inside the Files section, click on File Manager.
2. Once you are inside the file manager, you want to be sure that you are inside your public_html directory.
3. Inside the directory, select all your files and folders, and on the top menu, click on Compress.

4. When the zip file is ready, right-click on it and hit Download.
Step 2: Export your database from GoDaddy
1. Go to your cPanel in GoDaddy and scroll down to the Databases section. Click on phpMyAdmin.
2. On the left sidebar, you will see all your databases. Click on your website’s database name. The database will show its content on the right, and you will see several tables showing, like comments, posts, links, etc.
3. Next, on the top menu on the right, click on Export.

4. Choose the Export method >> Quick and Format >> SQL. Click Go. Now, the database will be downloaded to your PC.
Part 2: Transfer your domain name from Godaddy
Step 1. Open domain settings
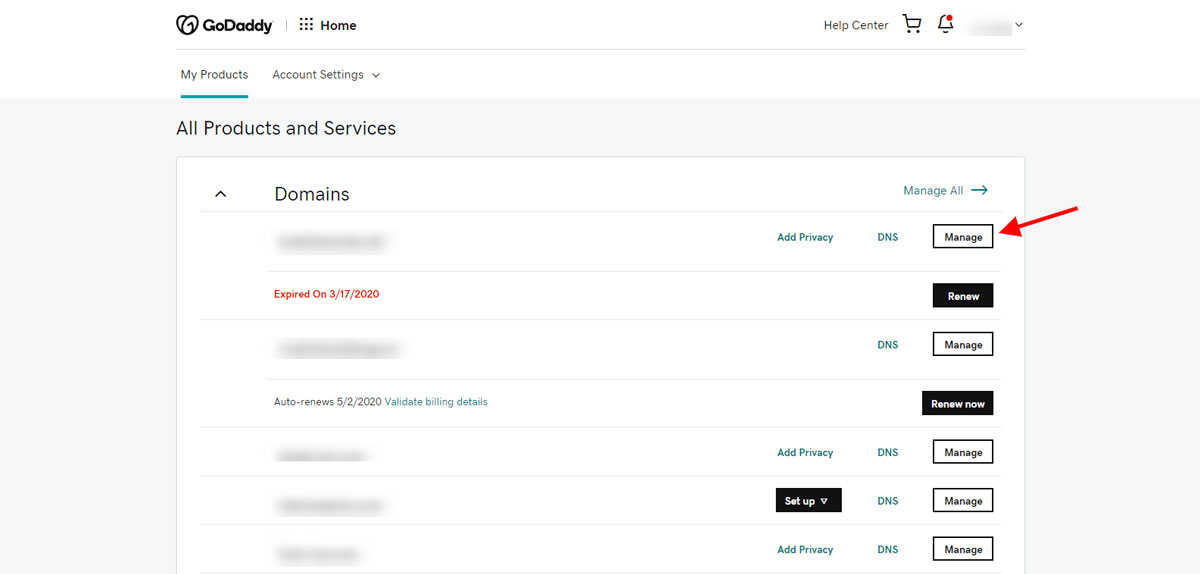
Inside your Products page, choose among the list, the domain name you wish to transfer, and click on “Manage”
Step 2. Check your Whois contact information
Next, you need to check if your contact information is correct. This is vital because based on the given credentials, this will ensure that you receive the authorization code to the specified email address and keep your domain under the name you specified.
So make sure everything is right.

Step 3. Disable Privacy domain protection
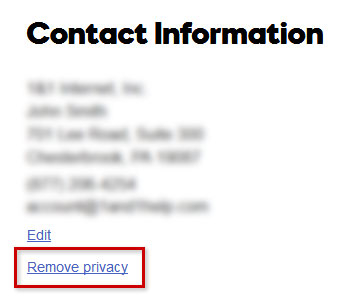
Now, you need to disable your privacy protection for your domain name.
Assuming you already purchased privacy protection for your domain, in that case, you will have to click on “Remove Privacy” which you can find right under your contact information.
Step 4. Change Name servers
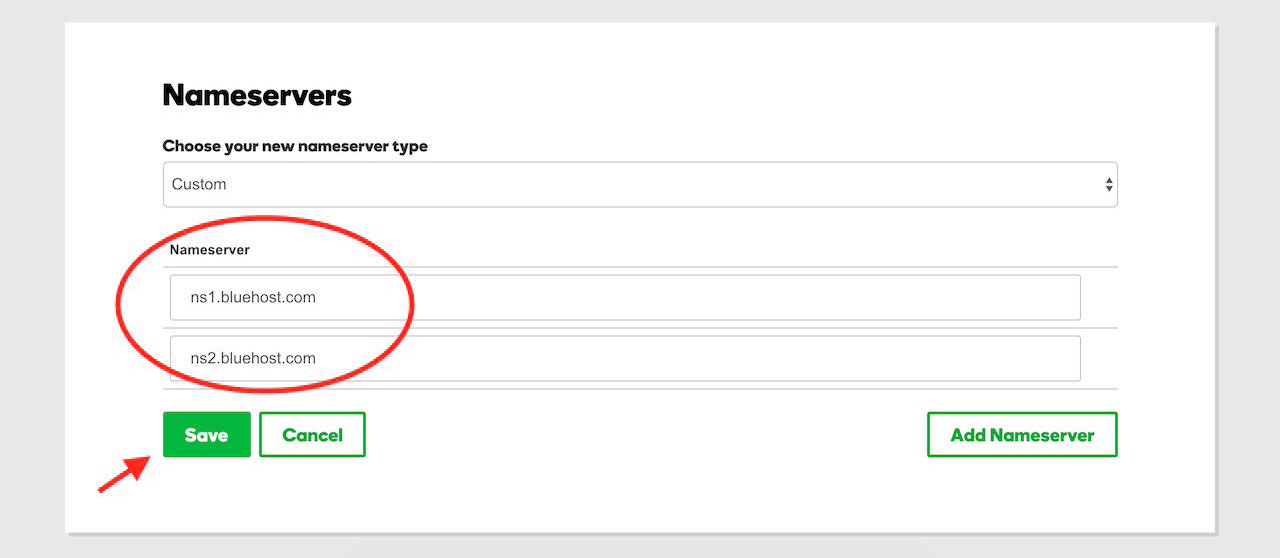
During this transfer process, if you want to minimize the downtime as much as possible. We recommend changing your Godaddy name servers to point to Bluehost.
You can do that by entering the following name servers, in your domain DNS settings, scroll to the bottom of the page and you’ll find a section where you can change your name servers as shown in the picture below:
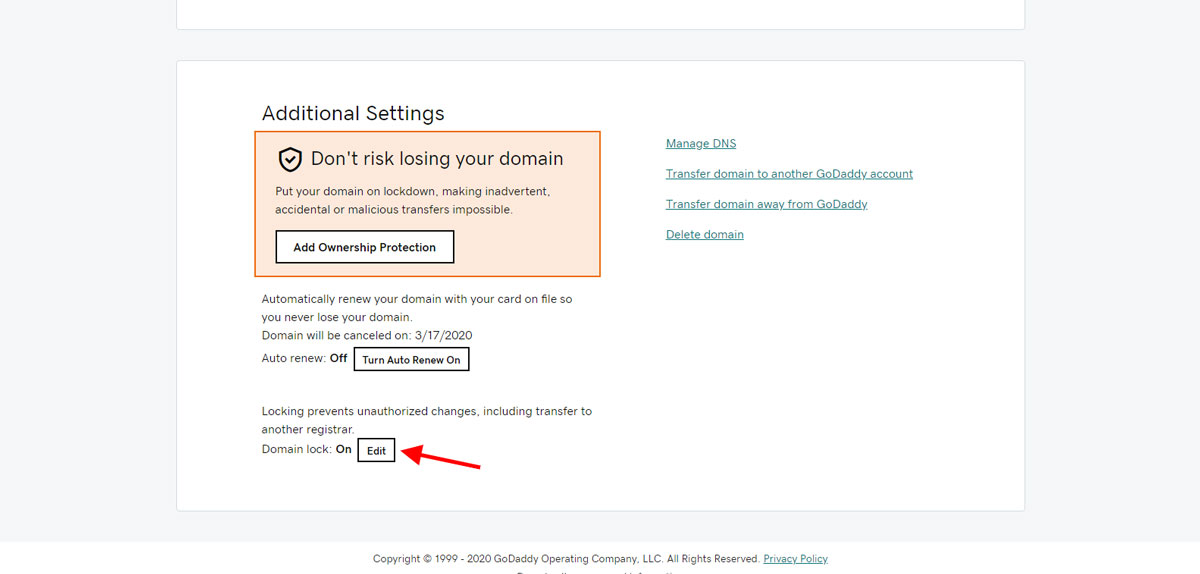
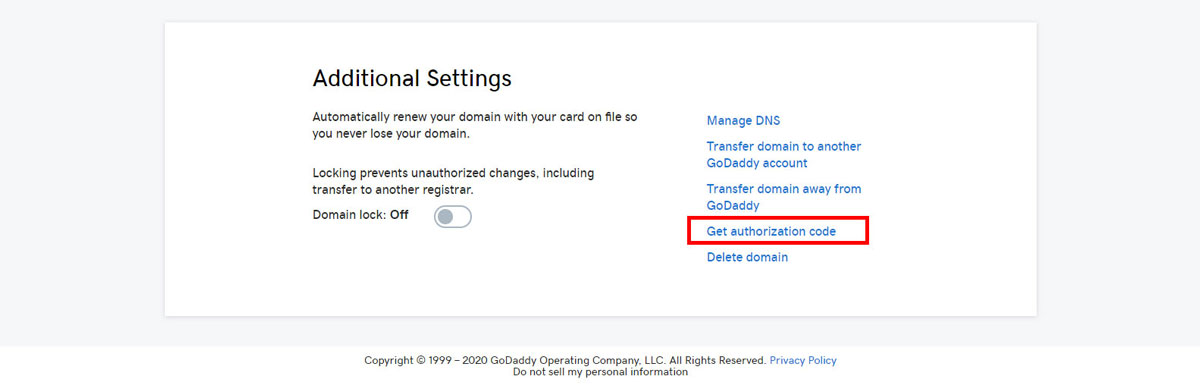
Step 5. Unlock domain name
After that, it’s time to unlock your domain name. You can simply do this by switching your locking status from ON to OFF.
Please note that for this change to take effect, it takes between 2 to 5 minutes.
Now, that our domain is unlocked. You are ready to get your authorization code.
Before you do this, double-check one last time if you have the right email address specified in your contact information.
This is where Godaddy will send you the authorization code for the transfer.
Press “Get authorization code”, and you will shortly receive an email containing your EPP authorization code.
After you click on the link, you’ll be taken to another page, proceed afterwards to the next page, and your authorization code will be sent to your email, and you’ll also have the option to view your authorization code from that same page.
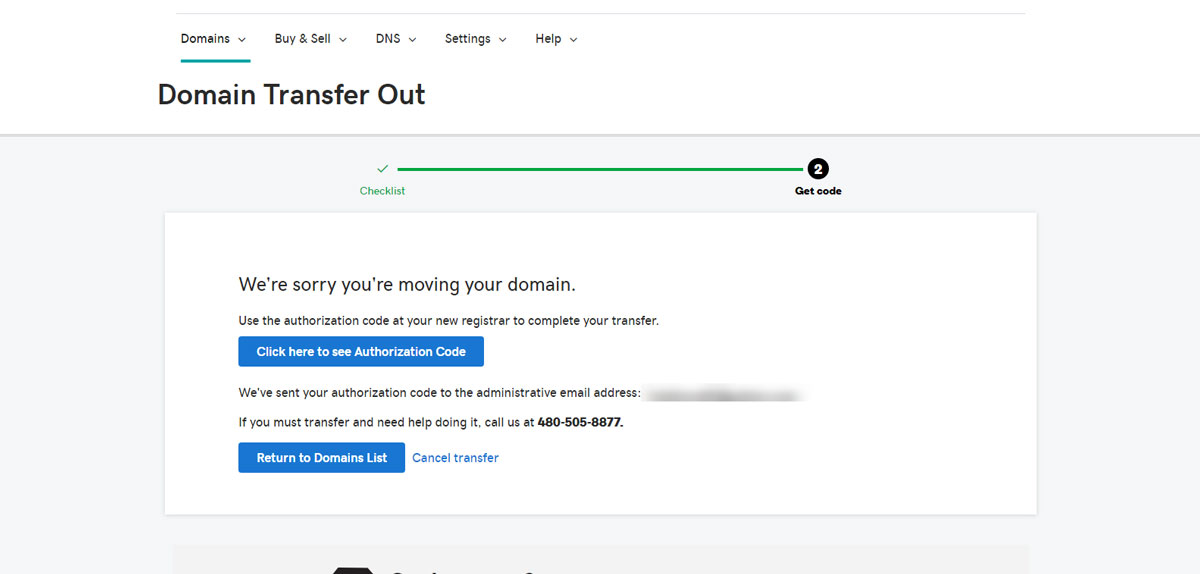
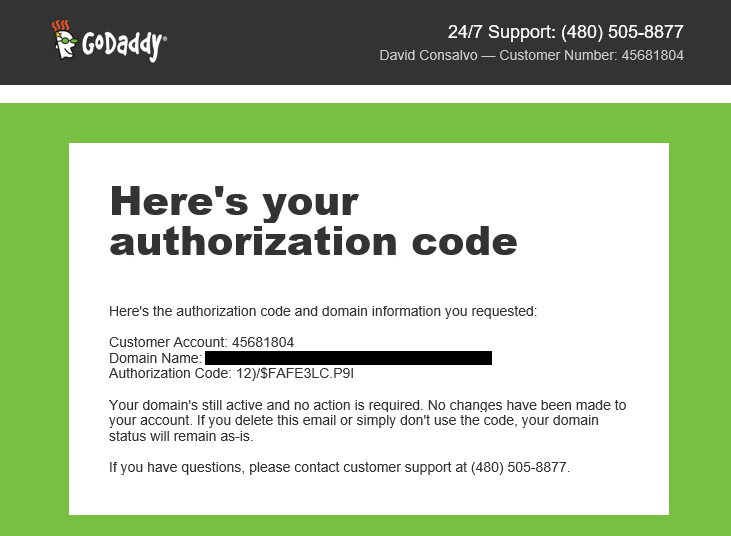
The email should look something like this:
Bulk domain transfer (optional)
Another way to do this is if you wish to unlock multiple domains at once and get all their authorization codes in a spreadsheet, go to “My products” and click on “Manage All”.

You’ll see next a table grid containing all your domains, check the ones you wish to unlock, then press “Export” as it is shown in the image below:
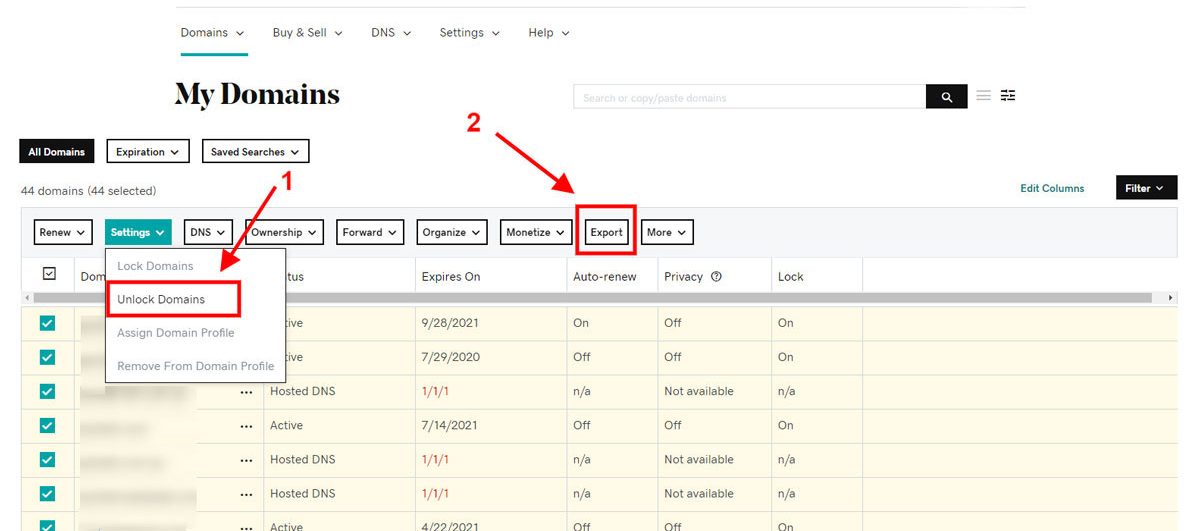
Next, you will get a popup where you can select the authorization code checkbox, so they can be included within the spreadsheet.
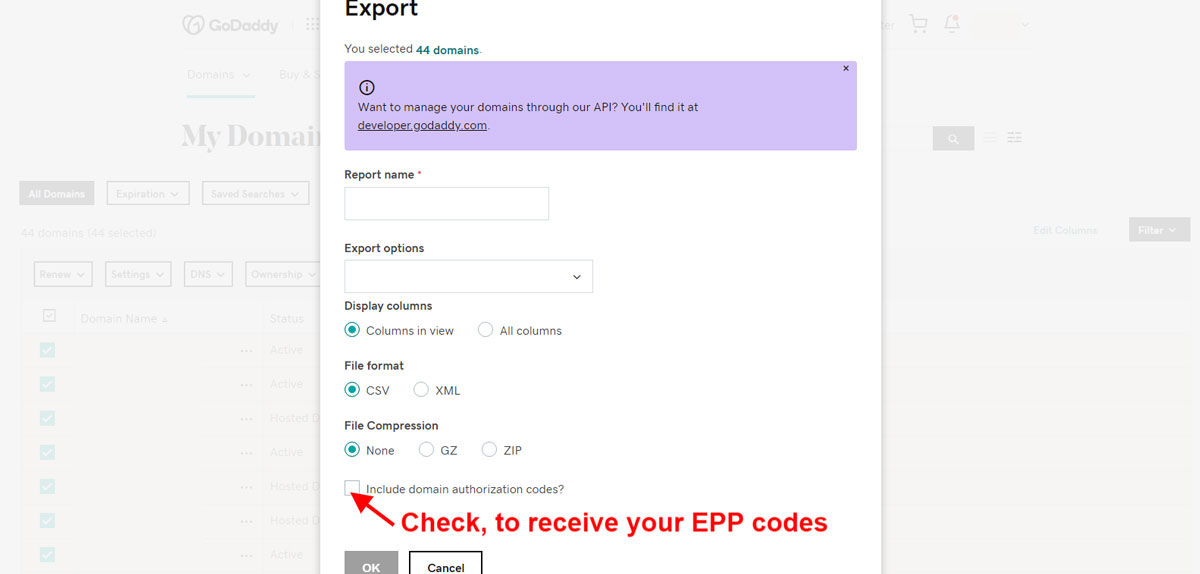
After that it’s done, you will shortly receive an email containing your CSV file with a list of your selected domain names and their authorization codes.
Part 3: Transfer your domain to Bluehost
Great job on completing the steps with Godaddy! Let’s move on to the Bluehost transfer steps.
Step 1. Get started with Bluehost domain transfer
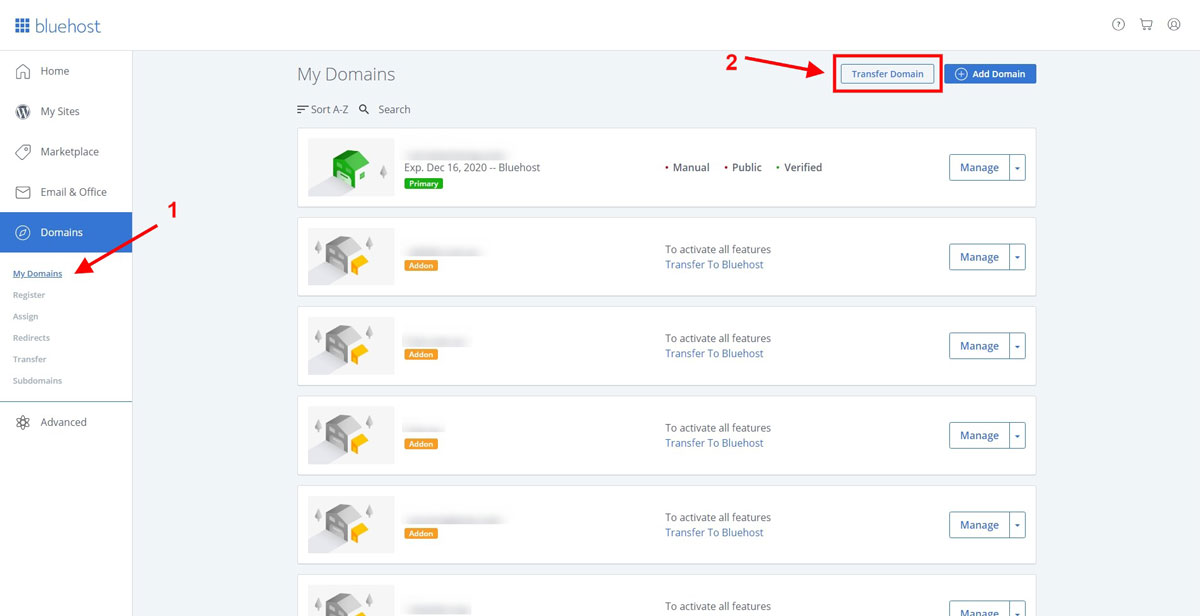
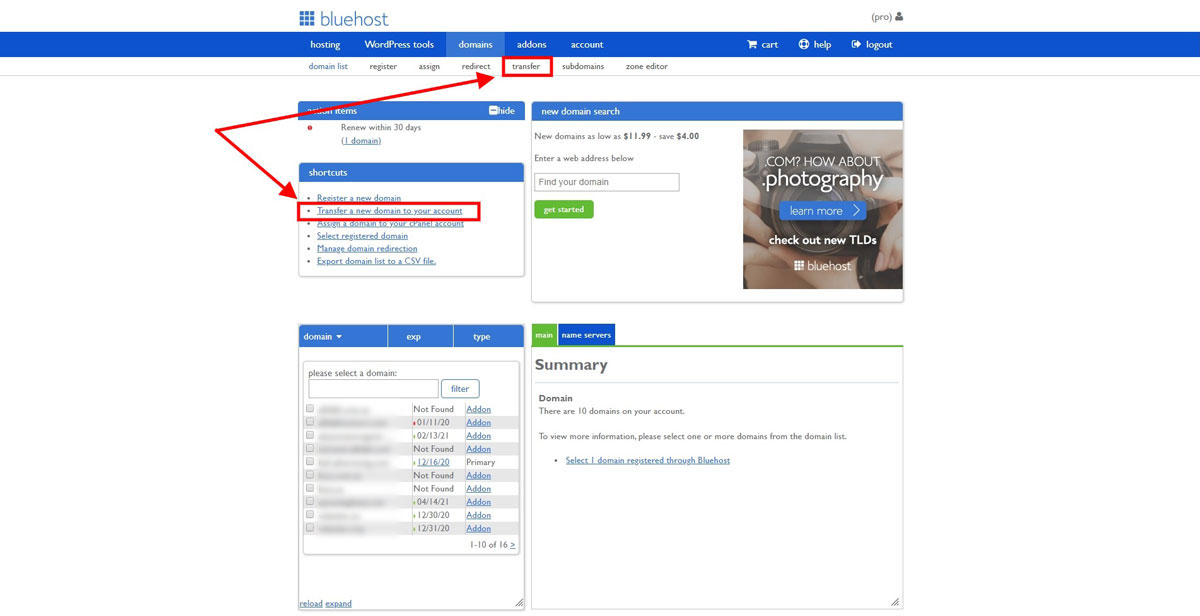
Now with Bluehost. Start by connecting to your Bluehost account. Click on “Domains”
Depending on where you were initially, you might get a different page layout for your domain manager. But overall, they are both fine.
Here are two images showing you where you can access the transfer page on both versions of the domains page:
Step 2. Add your domain name
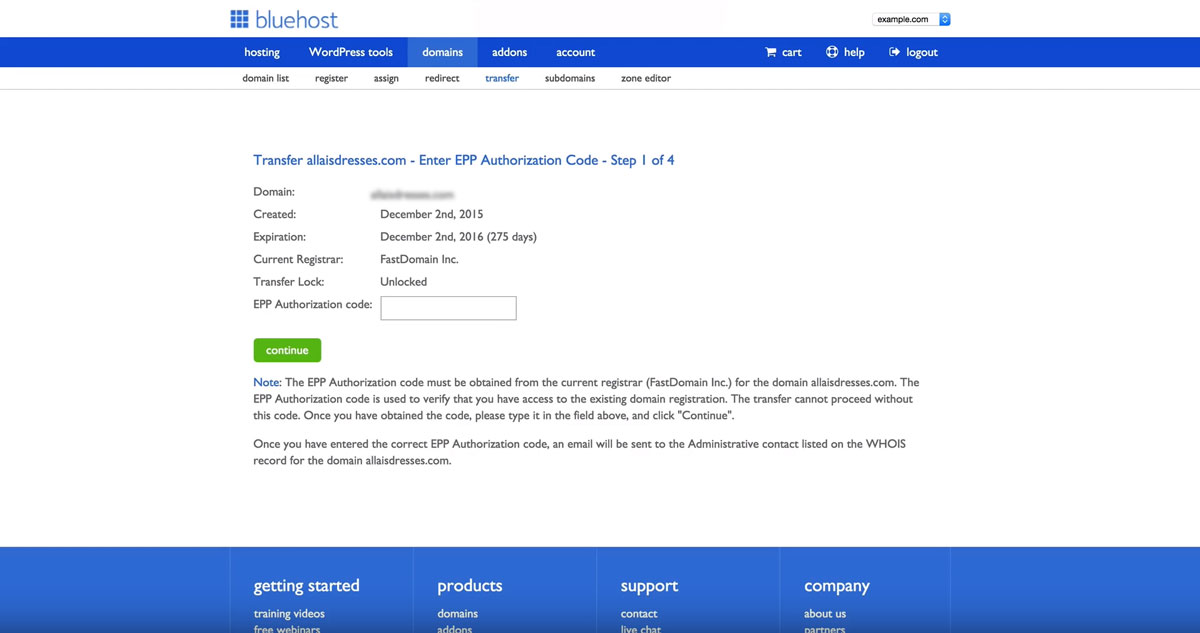
Enter the domain name you wish to transfer
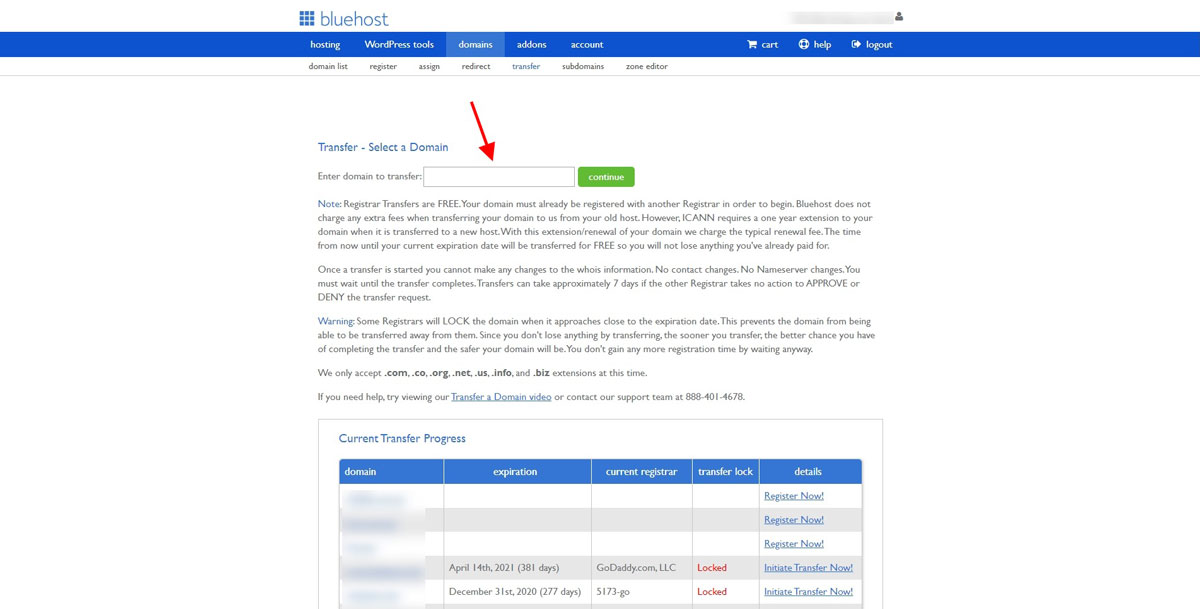
After entering the domain name, you’ll be asked for your EPP authorization code. Add the code you received in your email from Godaddy.
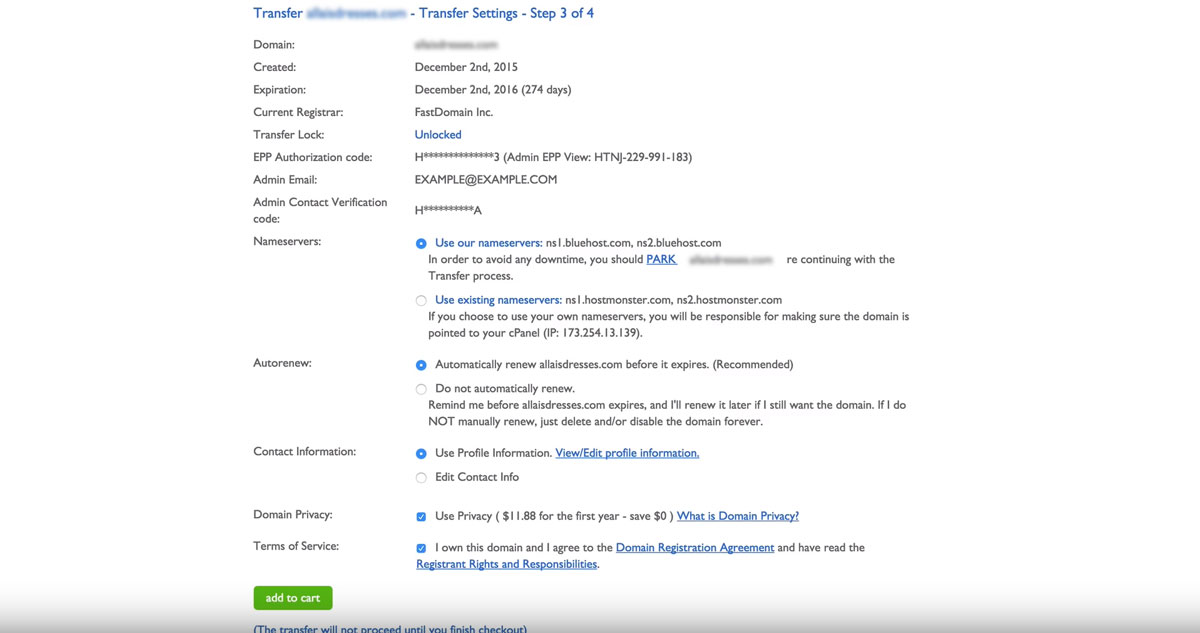
Step 4. Transfer Settings
In the contact information section, you can choose the credentials that will display the contact information for your domain.
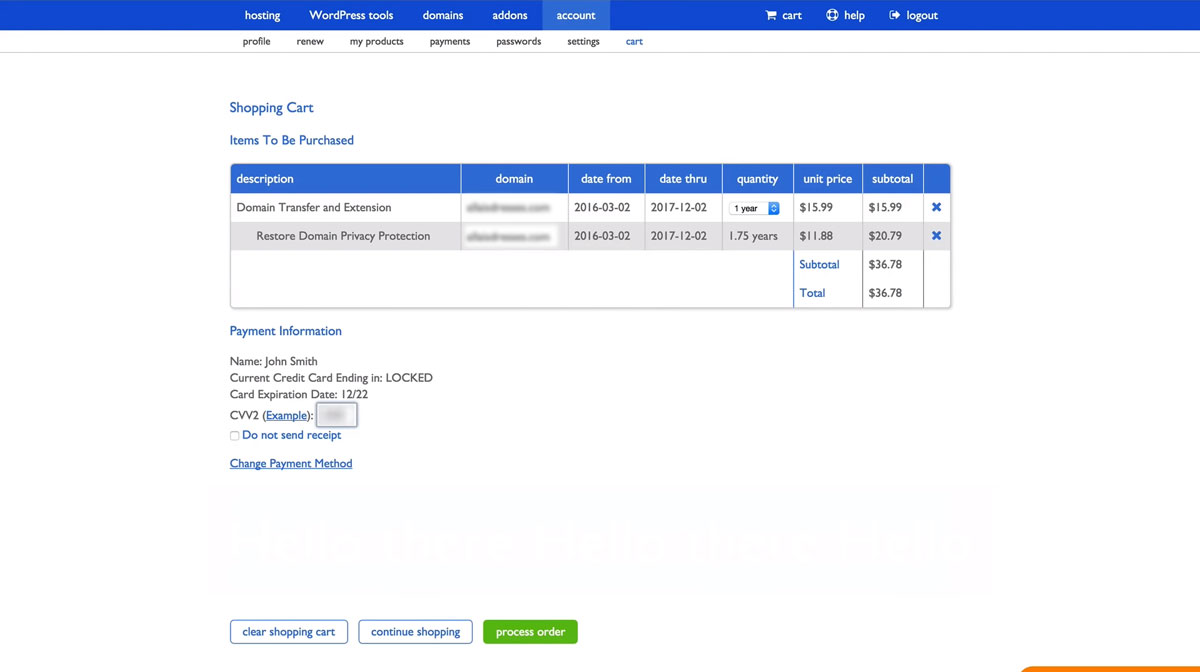
Step 5. Domain name transfer Payment
Now to the last step of our domain transfer process.
At the checkout page, make sure to select at least 1 year as the quantity for your domain.
Step 6. Check the progress
Usually, the transfer from Godaddy to Bluehost takes between 5-7 days. Meanwhile, you can check your progress by going to Domain Manager then on Transfer EPP under the details, you can see the current status of your domain transfer

Lastly, once your transfer is complete, you should receive an email from Godaddy notifying you about the success of the domain transfer.
Part 4: Transfer Your Files to Bluehost
Here, we will import all the data we download from Godaddy into your Bluehost account.
Step 1: Transfer Your Website files to Bluehost
1. In your Bluehost account, on the left sidebar, click on Advanced.
2. Inside the “Files” section, click File Manager.
3. Next, inside your “public_html” directory, click on Upload on the top menu, and select the zip file you downloaded earlier from GoDaddy.

4. Once the upload is completed, select the zip file and click on Extract from the top menu.
Step 2: Transfer Your Database to Bluehost
1. Go back to your Bluehost dashboard, and once again on the left sidebar, click on Advanced.
2. Click on PhpMyAdmin inside the “Databases” section.
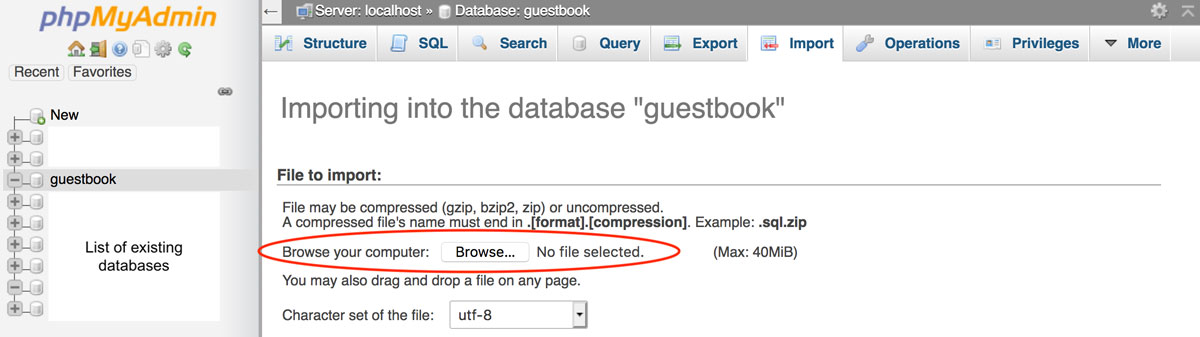
3. Once inside PhpMyAdmin, on the top menu, click Import and select your database SQL file.
4. Lastly, make sure to put the appropriate name of your database and username/password inside your wp-config.php file.
Conclusion
Well done on completing the job. Now you realize that it’s not hard as it seemed the first time.
If you run into any troubles during this process, let us know in the comments so we can help you get through it.
Also, we would like to add that you should also consider moving your emails as well. There is no point to keep paying Godaddy for that service when you can have the same service with unlimited email accounts for free with Bluehost.