If you are looking to transfer a domain from Godaddy to HostGator, you have come to the right place. We will see a step-by-step guide on transferring the domain name and making the process a lot easier.
Godaddy might seem like a cool domain provider at first. However, as you continue using their service for a while, you might start thinking that it’s expensive. For the same reason, you might want to transfer the domain name.
Let’s see a quick overview before we get into the main part.
Overview of Transferring a Domain
Transferring a domain from Godaddy to Hostgator means you are transferring the complete domain name. In simpler words, if you want to renew it or manage the domain, you will have to do it from HostGator.
Godaddy will no longer be in the picture here. You can do all the things from the HostGator website itself. It’s like you have purchased the domain from HostGator itself.
Why people Transfer the domain?
- They have a very high renewal rates. Sometimes, due to the offer, the starting deal might sound affordable but the renewal rates are too high.
- It’s hard to find the exact pricing.
- Most of the other companies offer free privacy protection and even free SSL certificate. However, you will have to pay for all of these when it comes to Godaddy.
However, some people are not facing any such problems. If you are one among them, you can simply point the domain to HostGator instead of transferring it. Here, you will have to open Godaddy to manage the domain name.
However, if someone visits your website, it will open the website hosted on HostGator. If you have bought the hosting from HostGator and want to keep the domain at Godaddy, this is the best thing you can do.
We will be covering both of these things in this guide. So, you can grab a cup of coffee while we see the transfer procedure in part 1 of this article. Thereafter, we will see how to change the DNS and keep the domain in Godaddy but point to HostGator. We will also see which one you should do. So, don’t worry if you are confused.
We will see some of the terms and conditions in between as we go.
Part 1: Transfer Domain from Godaddy to HostGator
Here are the exact steps you should follow if you want to transfer a domain from Godaddy to HostGator.
Step 1: Update the Contact Information
Your domain has a contact box where you put all your information. This is divided into a couple of more segments. For example, you have admin contact details, registrant details, etc. To transfer the domain name, you will have to change the administrative details.
No doubt, if you want to be safe, you can change all the details.
To do that, you will have to go to My Products where you will all the domain names and hosting (if any). You will have to click on the Manage button.
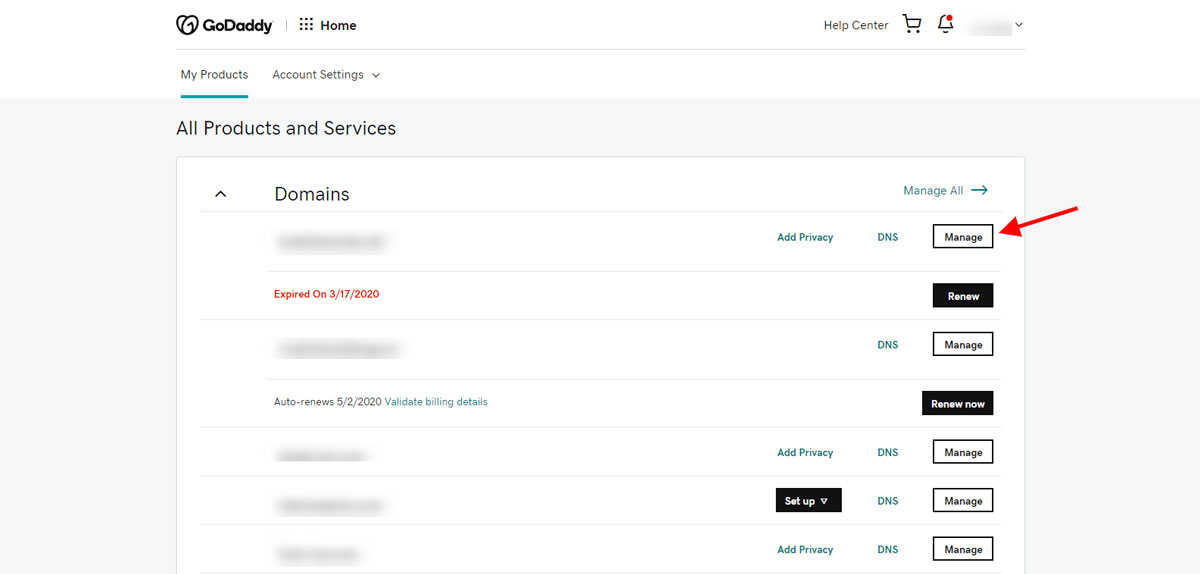 Scroll down a little bit and you will see the option to change the contact details.
Uncheck “Update all contact details” and then head over to the Administrative tab.
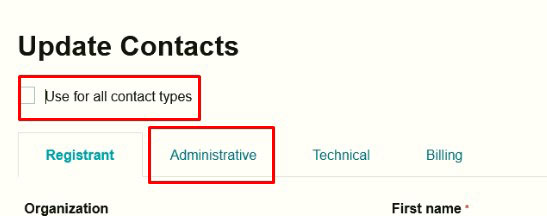 Make sure the email address is correct, you can ignore other things for a while but the email address is the most important thing.
Step 2: Turn off Privacy Protection
You might be using Privacy Protection for your domain name. In this case, you will have to turn it off.
Privacy protection will hide the information from the general public. If you keep it on, it isn’t possible to make the transfer. So, you will have to turn it off. You can do this from the same page where we were (on the manage page).

If you have already paid for it, Godaddy might further ask you to downgrade it. You will need to click on the downgrade button.
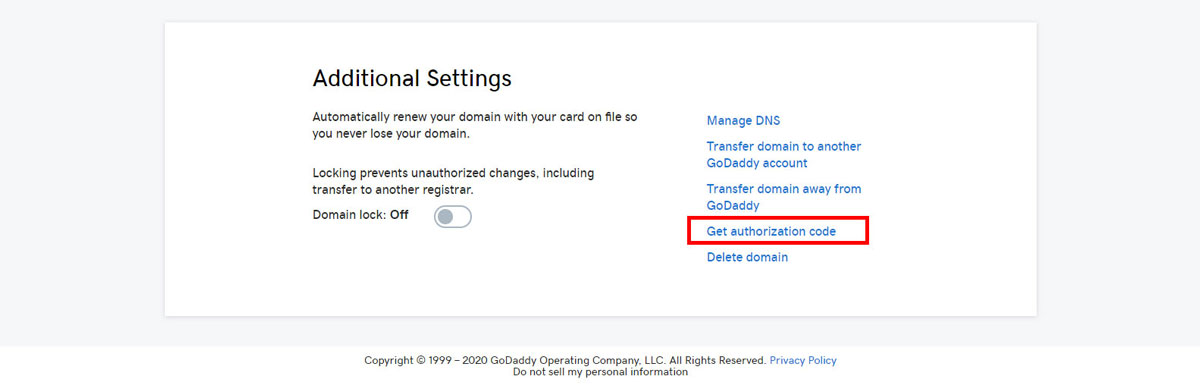
Step 3: Unlock the Domain
Did you know, your domain is locked by default? To ensure security, the domain provider will lock your domain name. In simpler words, without unlocking it, no one can transfer the domain out of Godaddy or any other domain provider.
So, as you might have guessed, you will have to unlock that. Come to the same “Manage” page, scroll down a little bit and you will see the domain lock option.
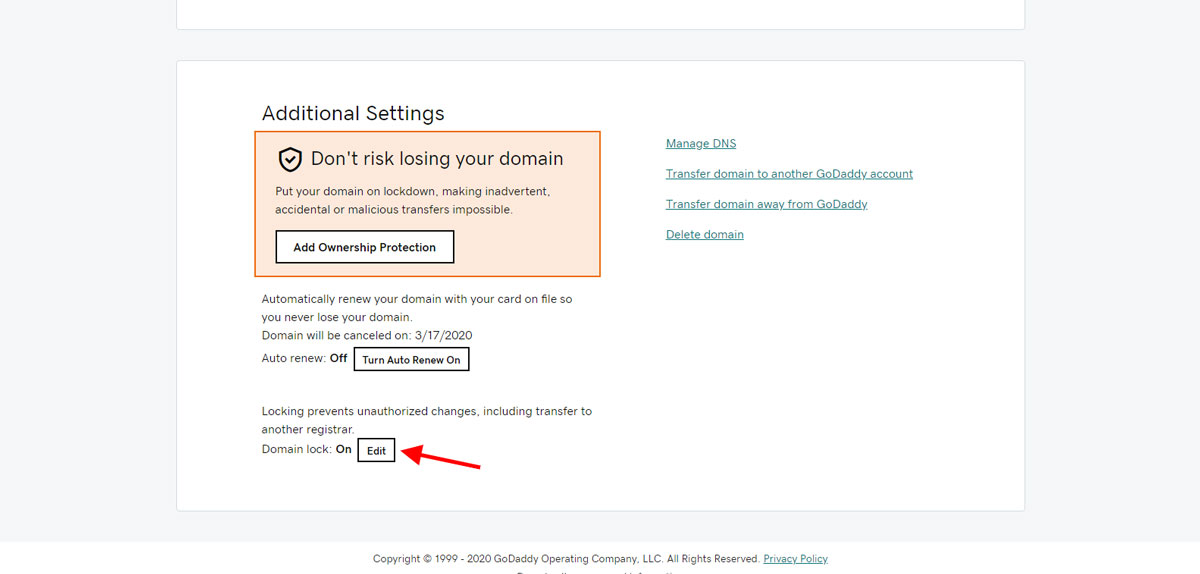
You will have to unlock the domain from there. It will say Domain Lock is on. Just click on Edit and disable it.
Step 4: Get the Authentication/EPP Code
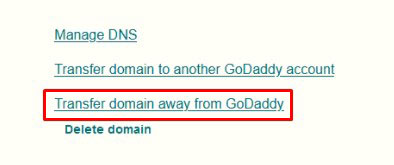
You will have to scroll down a little bit on the same page. You can directly go to the bottom as this option will be in the last section.
Now, you will see the option “Transfer Domain away from Godaddy”. This goes without saying, you will have to click on that.
 As soon as you click on that, it will present you with two steps. You can also click on “Get Auth code”.
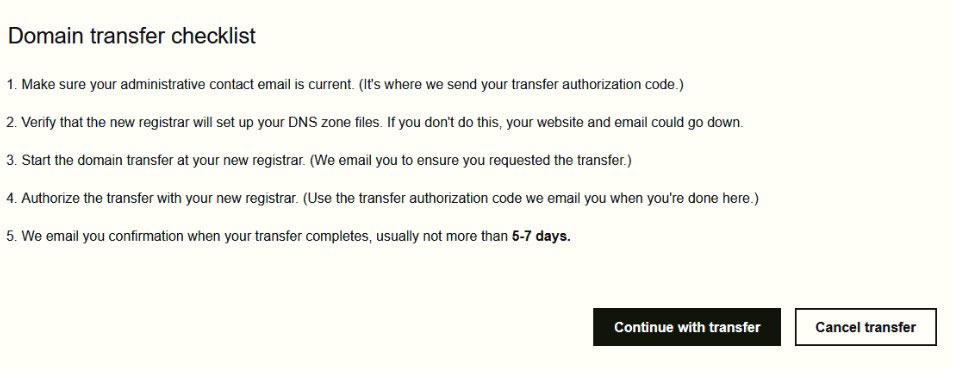
One will be a list of checklists and if you agree to the checklist, you can click on “Continue to transfer”.
The checklist is an important part which you need to read. Don’t worry, it’s not the entire TOS that will make you bored. There are just a few points that will hardly take 1 minute to read. So, make sure you read them all.
Here is a quick screenshot of the list if you don’t want to do all the steps to read it.
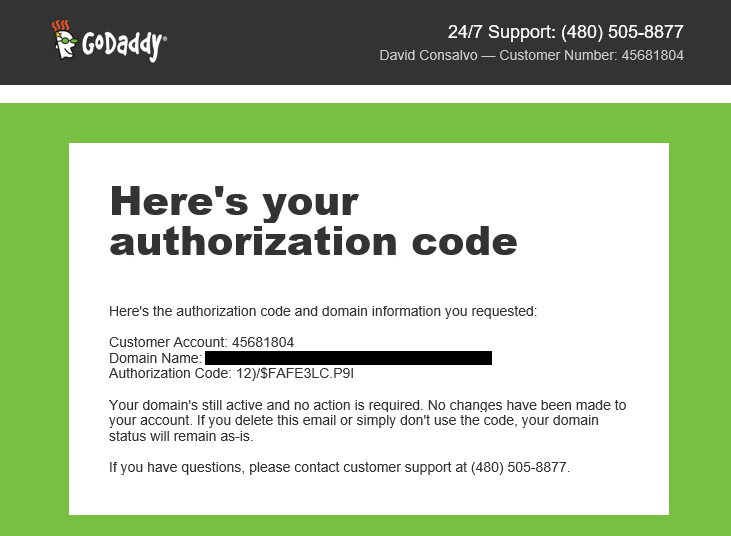
 If you agree with them, you will see the authorization code. They might send you an email confirmation because this is sensitive information.
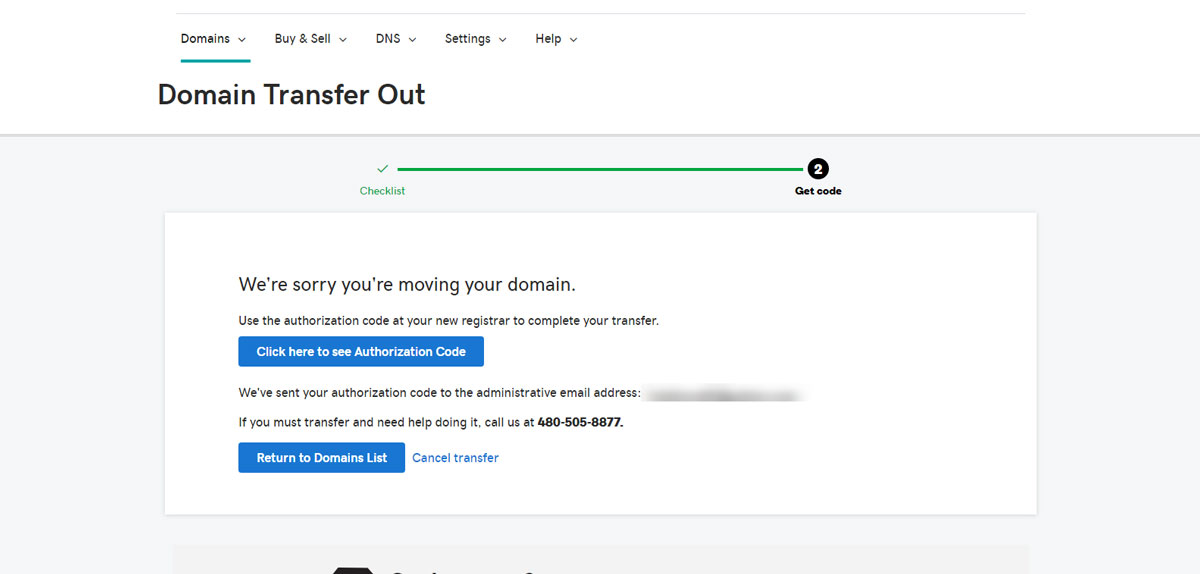 Copy the code and paste it somewhere safe. Please treat this as your password and keep it safe.
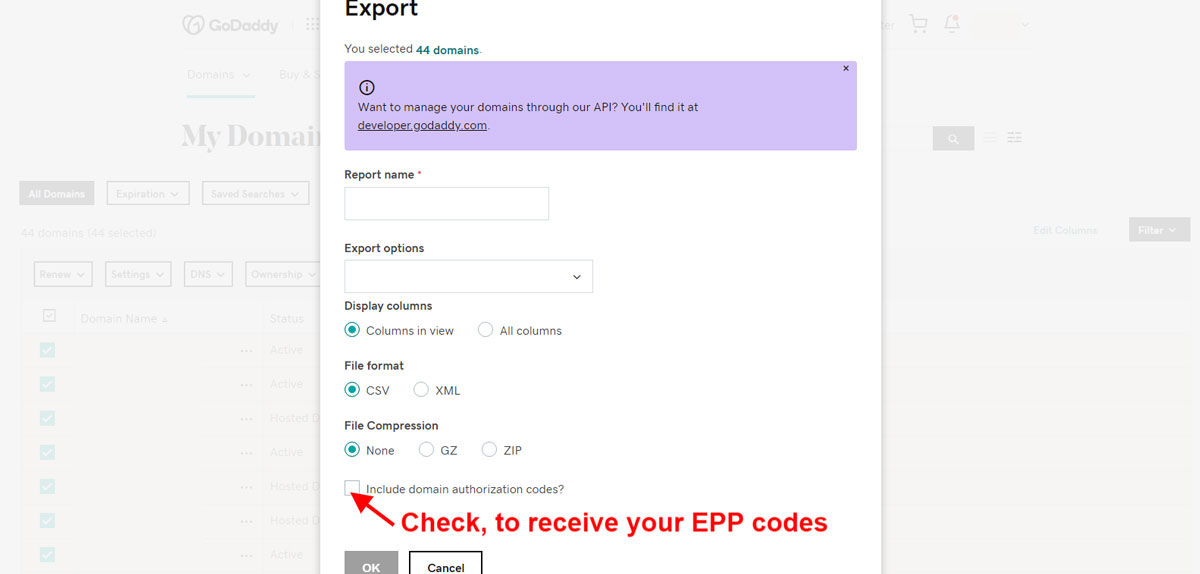
 If you want to transfer more domain names, you can select all of them hit the export button. It will give you some selection options. It will a checkbox using which you can also get the EPP/Auth code.
Step 5: Go to the Domain Transfer Page of HostGator
A long title for this step, right? But don’t worry, the step is easy and it won’t take long to complete.
You will have to open HostGator and head over to the domain transfer page. You can simply go to the domains page and there will be an option to transfer the domain.
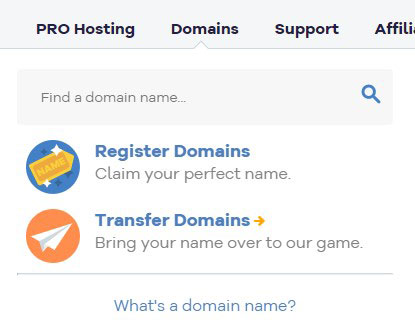 You can now enter the domain name that you want to transfer.
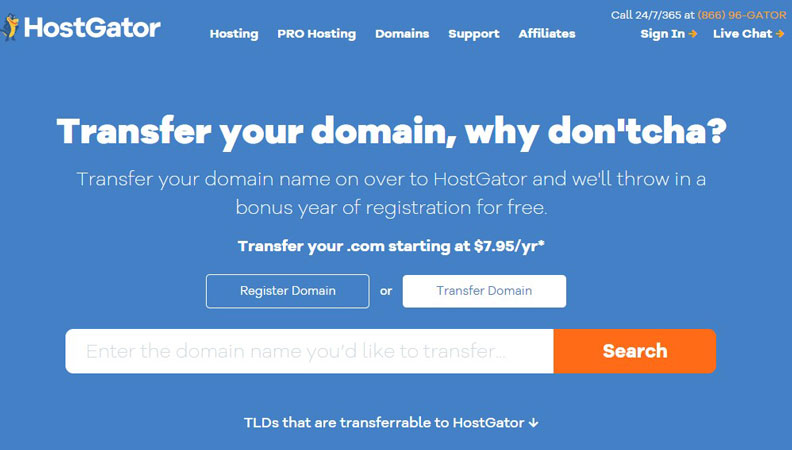 Don’t forget to read the below-given condition.
 Here is a complete list of domains that are allowed to be transferred to HostGator.
Once you enter the domain name, you will have to click on the continue button and complete the procedure. By procedure, we mean that you will have to do the following steps:
- Click on the continue button and you will be redirected to checkout
- You can either create an account at HostGator or you can always log in to the existing account.
- You can recheck all the information on the next page (order summary page). Make sure you have spelt the domain name right.
- Enter the authentication code we copied earlier.
- Once you do this, you will have to enter the billing information and make the payment.
- Thereafter, you will have to head over to the next page.
“Make the payment” word might come as a shocking word for some people. HostGator will charge you a fee to make the transfer. But, here is the good news. You aren’t paying for the transfer but you are paying for the one-year renewal.
When you pay the transfer fee, your domain name will be renewed for one more year in that fee. So, it’s more like a renewal fee rather than a transfer fee.
The only catch is that you will have to pay the renewal fee (transfer fee) even if your domain’s expiry date is not near. That’s a small thing that will be alright for most people, right?
If everything is fine, why are we here? Let’s see the next step.
Step 6: Approve the Transfer
The domain is still in your GoDaddy account and you will have to approve it. There are two possible ways you can do it.
The first one will be to check your emails. You might have received an email where you will have to approve the transfer. You can directly approve the transfer from there. They might ask you for your Godaddy password to confirm it.
Alternatively, you can always visit GoDaddy’s website and approve the transfer. Head over to my Products and click on the manage button for your domain name. You will see the notification form in which you can approve the changes.
If not, you can always go to Domains > Domains Transfer in your Godaddy account. You can use any of the given methods to approve the transfer.
Step 7: Confirm the Changes
It might take a while for the transfer process to complete. So, don’t worry about it. Once it is completed, you will get an email confirmation about the same thing.
Now, there is no action needed from your side but you will have to make sure that the domain name is successfully transferred.
Step 8: Change the DNS (if applicable)
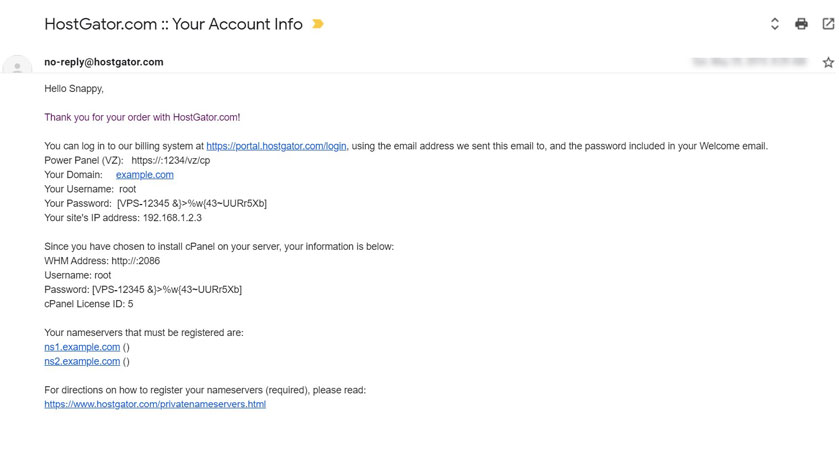
Now, you can surely change the nameservers if it’s applicable to you. If your website was not pointed to HostGator, you will have to change the name servers. For that, you can find the name server details in the welcome email.
Alternatively, you can log in to your cPanel and see the nameserver details. If you want more details about how to find the DNS in your HostGator, you can head over to “Step 1 on Part 2”.
Please note that the nameservers are different even if you have the account in HostGator.
Now that you have the nameservers, you can head over to Domains from your HostGator panel (not cPanel).
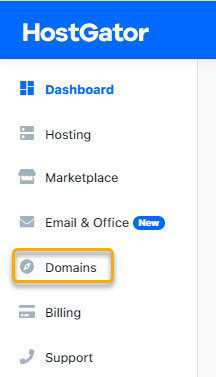
Find your domain name, click on more, and you will see all the information. Click on the edit button next to the Name servers. This will allow you to change the nameservers.
 That’s it, you have successfully done all the steps.
Part 2: Point Godaddy Domain to HostGator
There are good chances that you don’t need to transfer the domain from Godaddy to HostGator. Instead, you just want to use the Godaddy domain with your HostGator hosting.
We are here to solve all your questions. So, let’s see the step-by-step guide to point Godaddy domain to HostGator.
Step 1: Get the NameServers
If you read the above guide, you might be knowing that there are different name servers for the accounts at HostGator. So, you will find your nameservers first.
There are various ways you can find it. You can copy them and keep the tab open for a while. Nameservers looks something like this: NS1.Hostgator.com and NS2.hostgator.com. Of course, the domain might be different and it’s not the same. Let’s see the ways to find them.
The first one is where you can check your welcome email. If you recently bought the hosting from HostGator, you might have got the welcome email. In the welcome email, HostGator will have sent you the name servers as well.
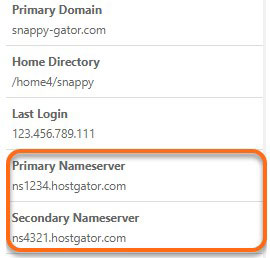
 The second way is to find them via cPanel. You can open the cPanel where you will see the nameservers directly. You can see the sidebar where all the information will be displayed about your hosting including your name server details.
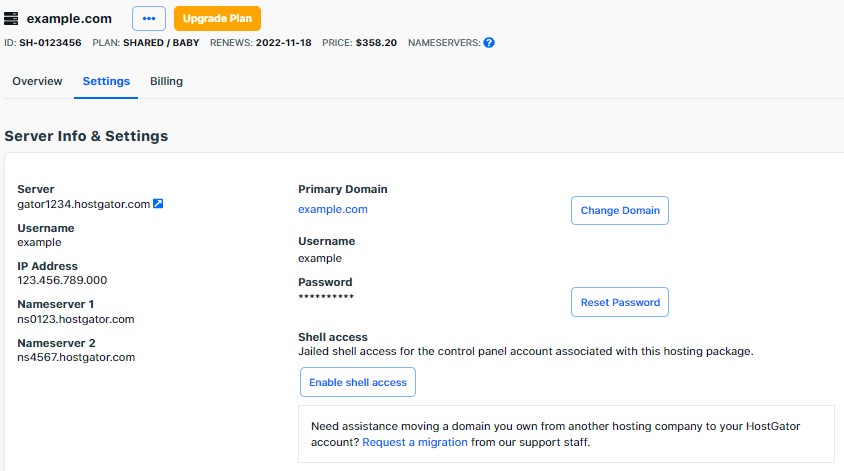
 The third way is to head over to your HostGator account and go to your hosting account details. Select hosting from the customer portal and select “manage”. You can then go to the settings tab where you will find all the information.
 Like we mentioned, you can either keep the tab open for a while or you can surely copy them and keep it safe.
Step 2: Open Godaddy
The next step is where you will have to open Godaddy. You will have to head over to My Products > Domain.
You will have to click on the “Manage” button.
On the settings page, you will see an option called “Manage DNS”. You can surely change the nameservers from there.
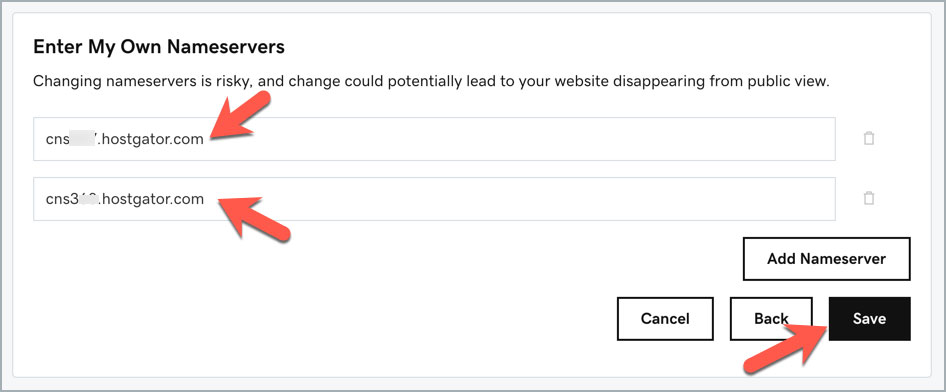 Here, you will have to paste the name servers that you copied earlier. You can click on the save button thereafter.
There are two nameservers to add. You will have to add the primary nameserver which is the first one and then you will have to click on the second nameserver.
It will take some time for the nameservers to propagate. In simpler words, when you change the name server, you will have to wait for a couple of hours for the name servers to work properly. In most cases, it will be done in 2-3 hours but it might take up to 48 hours. So, don’t worry if it doesn’t work directly when you change it. It will take some time.
Many online tools will allow you to check the name servers. So, you can also check this tool to know what’s the progress of the DNS propagation.
Which one is Best for you?
Now comes the last question, which one is best for you? This might be a confusing moment for you.
You should transfer the domain to HostGator if:
- You are tired of Godaddy with the high renewal price or anything else.
- You are no longer using Godaddy.
- HostGator is the main platform for all your digital needs. To be more specific, HostGator is the main platform for all your hosting and domain needs.
- All your domains are hosted in HostGator and you want to transfer the rest of them to manage everything in one place.
- You like HostGator’s pricing and features more than Godaddy.
In the same way, you should keep the domain to Godaddy and just point it to HostGator if:
- Your domain is not old enough.
- You like Godaddy very much.
- You are just trying out HostGator and you are not sure whether you are going to use it for long or not.
- You are not planning to renew the domain. In this case, you can keep it on Godaddy and save some money on the transfer fee. This is the easiest way you can save money.
- Your domain doesn’t meet the terms and conditions of any of the providers. If your domain name doesn’t meet the criteria of Godaddy or HostGator, you don’t have any other option rather than to keep it the same. You can’t transfer it out. So, you can start using it by pointing it to HostGator.
So, there is no personal recommendation here. You can go with the option which suits you the most.
Final Words
To conclude, these are the steps to transfer a domain name from Godaddy to HostGator. You can either follow the first part or you can also go with the second part as per your wish. It depends on the requirements and your needs.
To make things more clear, the last section is dedicated to the same thing where we saw some instances based on which you can make the decisions. Lastly, it’s your choice to make.
You can surely contact HostGator support or you can also contact Godaddy support if you want. Both of them will help you. Even Godaddy will help you in transferring the domain out. So, don’t worry about it and feel free to contact them if needed. Sometimes, they can offer you some renewal discounts to tempt you to stay. Don’t fall for that!
- HostGator Free Trial
- Why you should stay away from Godaddy
- HostGator Baby Vs Hatchling Plan (Comparison)
You can comment below if you have any doubts or difficulties with this transfer process.
FAQ (Frequently Asked Questions)
Does Godaddy charge for domain transfer?
No, Godaddy won’t charge you a single penny for the entire transfer process.
Does HostGator charge for domain transfer?
You are not paying just for the transfer. Instead, HostGator will renew your domain for 1 year with that transfer fee. So, you can count this as a renewal fee instead of a transfer fee.
Why is the transfer domain away from Godaddy disabled?
Your domain might be locked or your domain might be new to transfer. There are some transfer criteria that your domain must follow.
How long does it take to transfer a domain from Godaddy?
It usually takes a couple of hours to complete the transfer process. However, on some rare occasions, it might take up to 7 days for the entire process to be completed after you confirm the changes.
Should I transfer or connect my domain?
It surely depends on you. If you no longer use Godaddy, you should transfer it. However, if you are new to HostGator, you can connect it instead of transferring it.
How can I speed up my domain transfer?
You can make sure that all the things are set before you make the transfer. For example, keeping the details correct will speed up the process. Also, if the nameservers are already pointing to HostGator, it will speed up the process.
It would be $7.99 for the transfer fee plus $0.18 for the ICANN fee, and your domain would then expire in 2020 once it was in your GoDaddy account. If it was a . net, it would be $11.17 ($10.99 + $0.18), if it was a . org, it would be $12.17 ($11.99 + $0.18), and so on.
Thank you for the valuable info Rushik. Much appreciated 🙂