Disk quota exceeded is an error message that you get sometimes in cPanel when you try to upload a file, update the database, or send an email within your control panel.
Basically, this means that your account’s disk space is full, therefore, you need to free some space in it.
In this guide, we will guide you exactly on where and how to increase your disk space in cPanel, in WordPress and in your VPS(WHM) as well. We’ll also show you how to avoid this problem from happening again in the future.
So let’s get started 😊
Part 1: How to fix Disk Quota Exceeded cPanel
In the first part, we will see how to increase disk space in cPanel by focusing on your web hosting files.
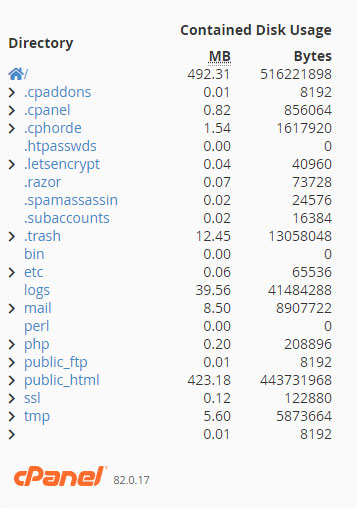
Step 1: Check your cPanel disk usage
To help us find out which directories are occupying the most space, we will use the cPanel disk usage tool.
Once you connect to your cPanel account, in the “Files section”, click Disk Usage.

As you can see, this shows you exactly which directories you should focus on once you access your file manager.
On the next picture, on the same page, scroll down to the bottom. If you click on one of the directories, it will show more directories from within. So you can keep on browsing inside the directory until you find which folder or file you should delete from your file manager.
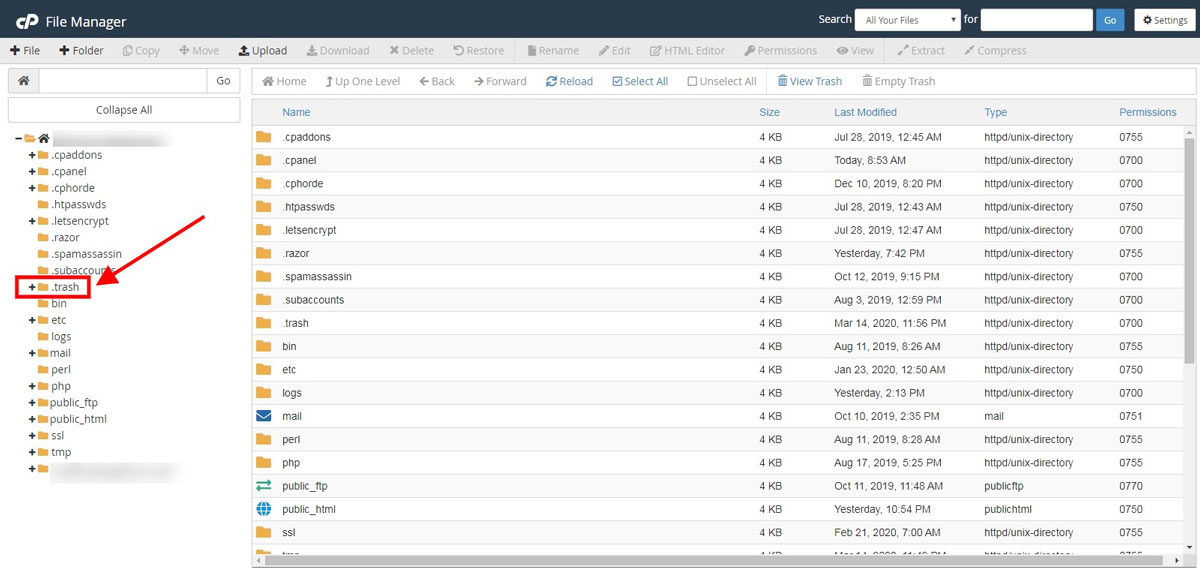
Step 2: Clean the trash folder
For those of you who delete files and directories directly from the file manager, there is a chance that those files are not removed permanently, and you can often find them inside the trash file.
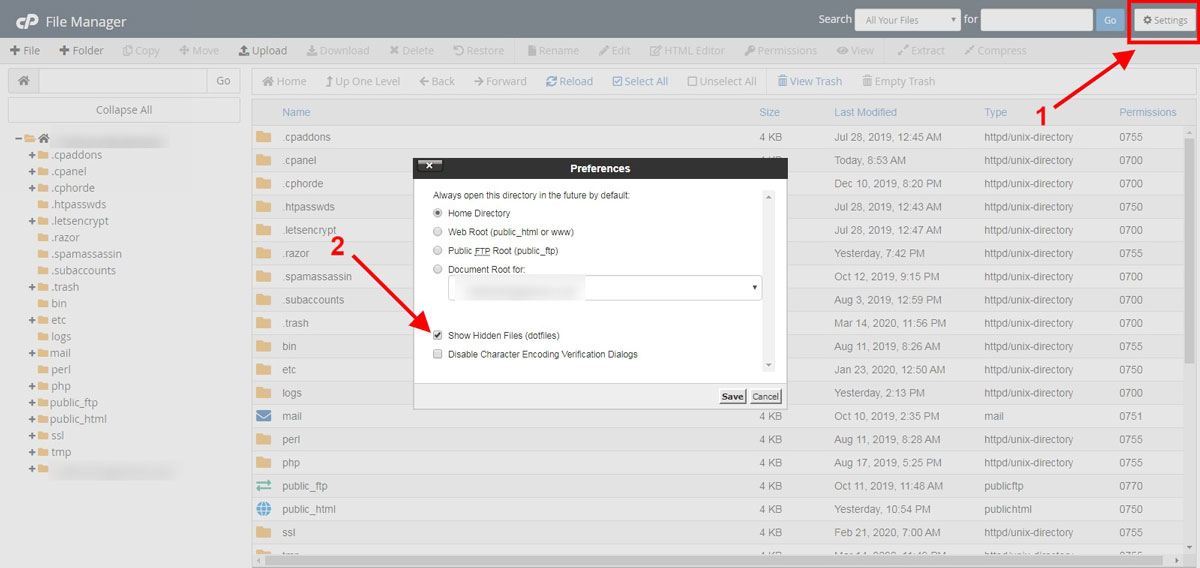
To remove them permanently, you need to check the trash folder by clicking on File Manager and then access .trash and delete everything inside.
Settings > Check Show Hidden Files.
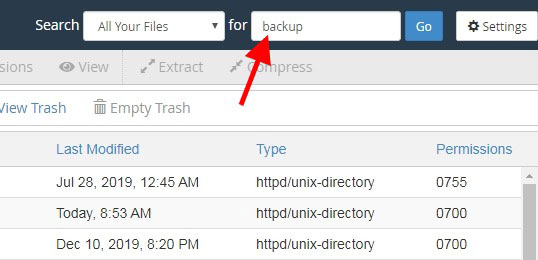
Step 3: Delete Backups and Snapshots
Backups are the files that take most of the disk space. They are often compressed on a zip file under the directory name of backup or snapshots. If you find one, go on and delete as many backups as you can.
To make sure not to miss any backup folder, you can use the search field by typing “backup”.
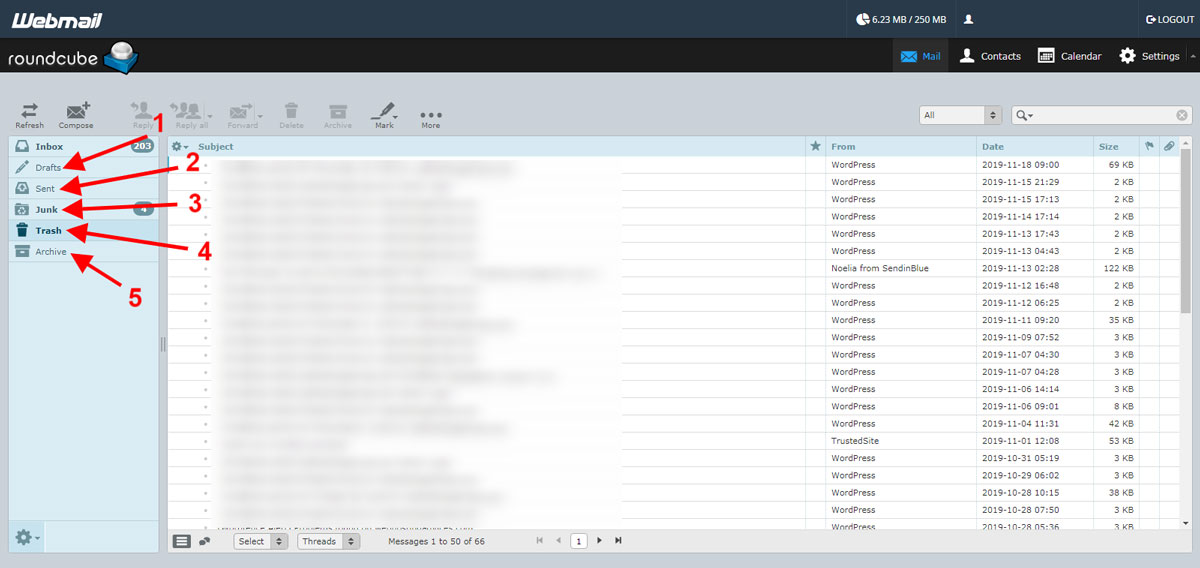
Step 4: Clean your emails
If you are using the IMAP protocol which stores your emails in your cPanel, then you want to free more disk space in your cPanel by deleting all the spam emails, junk emails, drafts, archives.
Probably you’ll find a big pile of those gathered from months or years of service. So this is the perfect time to clear your emails.
You can also delete any email accounts that you are not using.
Step 5: Clear cache in cPanel
To clear your cache in your cPanel, check for the content of both /tmp and /cache folders.
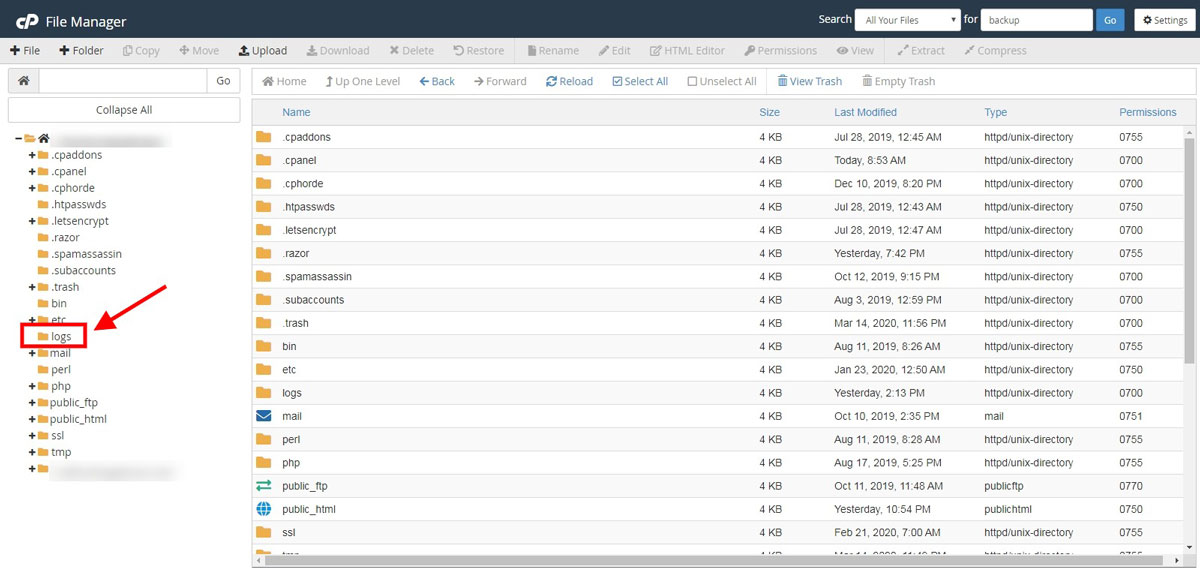
Step 6: Clean log files
A folder that is worth looking at is the logs folder. Each hour or a minute that passes by, the server records each time every event on your log files.
After repeating the same process over several months and years, the logs folder size starts to become significant. So clean it if it’s occupying a big space in your disk.
Step 7: Remove unused web apps
It is common to have some installation files of your app laying around somewhere or some staging versions of your app. In that case, make sure not to leave any of them.
Part 2: How to fix disk quota exceeded for WordPress
In this part, we will see how we can improve your WordPress disk space usage. But first, if you still have some space, go ahead and create a new backup.
If you still don’t have enough space, that’s alright. Remember, in our guide we recommended in step 3 of part 1, to keep at least one backup.
But don’t worry, it is highly unlikely that you will need any of them, the following steps are easy to follow. So let’s continue!
Step 1: Delete WordPress backups in root and wp-content
WordPress backups are the biggest files responsible for an increase with WordPress disk space usage.
To fix that, all you have to do is to delete the old backups inside your website root directory. Search for the backups inside your home website directory and wp-content.
Step 2: Delete unused WordPress plugins and themes
Nobody needs more than one theme on their website. So, delete all the inactive ones and keep only the current active template with its child theme.
You can do delete themes, by either browsing through your file manager in wp-content/themes/ or if you prefer, you can simply do it within the WordPress dashboard.
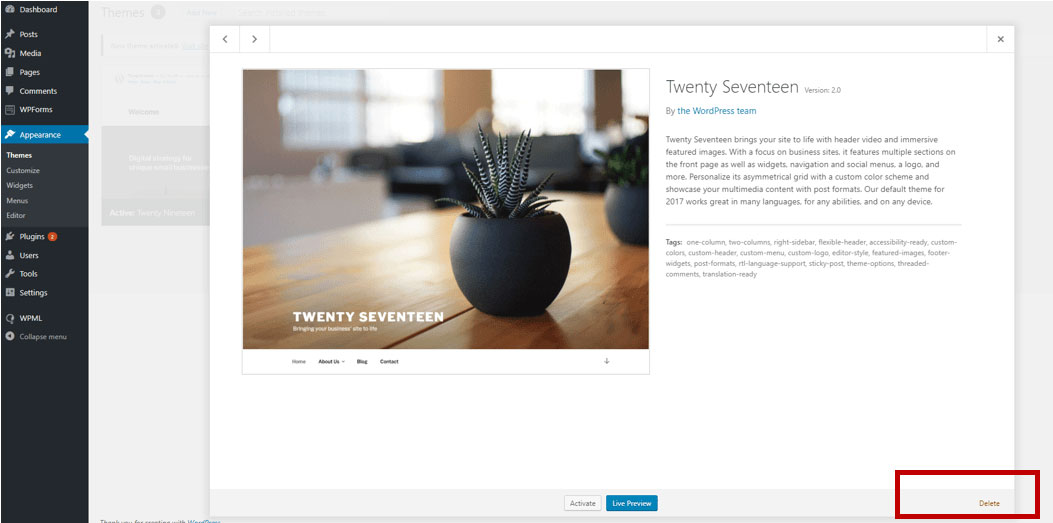
As for plugins, make sure to keep them at the absolute minimum. Any plugin you don’t need, or you might think you need in the future, it is best to delete it for the time being.
Step 3: Delete unused media files
The biggest directory in terms of disk space that occupies that has the biggest size in a WordPress site is the uploads directory.
As you probably know, this folder is for storing media files, such as images, videos, audio, pdf, etc.
Let’s focus on the images. They are often added to the site without being optimized and if this process is repeated over time with a lot of images, the website size starts to add up significantly. And let’s not forget the media files left by any prior demo content.
So here is a simple solution for this problem, you can use the Media Cleaner plugin. It basically detects and deletes all the media files that are not being used on your site.
So this is really efficient and time-saving for you.
Step 4: Host videos and audio files elsewhere
You may think that it’s a good idea to host PDF files, videos, or audio files along with your website. But that is a bad idea, simply because it consumes a lot of your server’s bandwidth and it occupies a lot of space that can be put to better use elsewhere.
So the solution is, host your big document files in a cloud file storage like Google Drive or MEGA that will allow you a free 50GB of storage. As for the videos and audio files, you can upload them on your YouTube account, that way you no longer have to worry about disk space.
Step 5: Database disk quota exceeded, How to fix it?
The next step focuses mainly on the database. But before going any further, we strongly advise you to backup your WordPress database first.
So far, we have been focusing on files. But another way that you can free extra space is to clean your database to stay safe from a database disk quota exceeded. That basically means, doing the following actions:
- Delete post revisions
- Delete spam comments
- Delete drafts
- Delete trashed posts and pages
- Delete plugins/themes tables that are no longer used
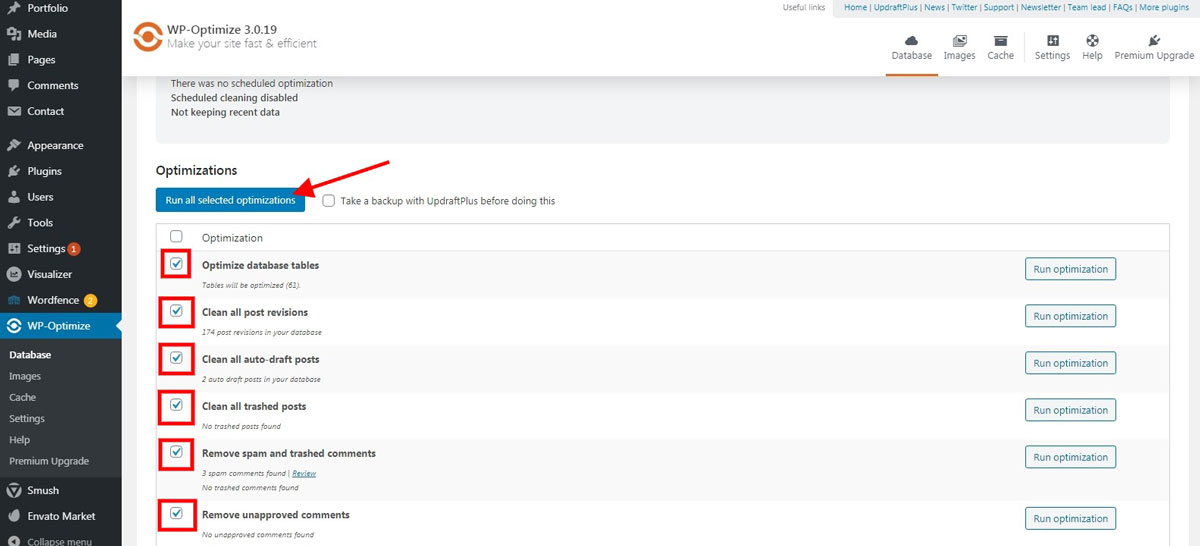
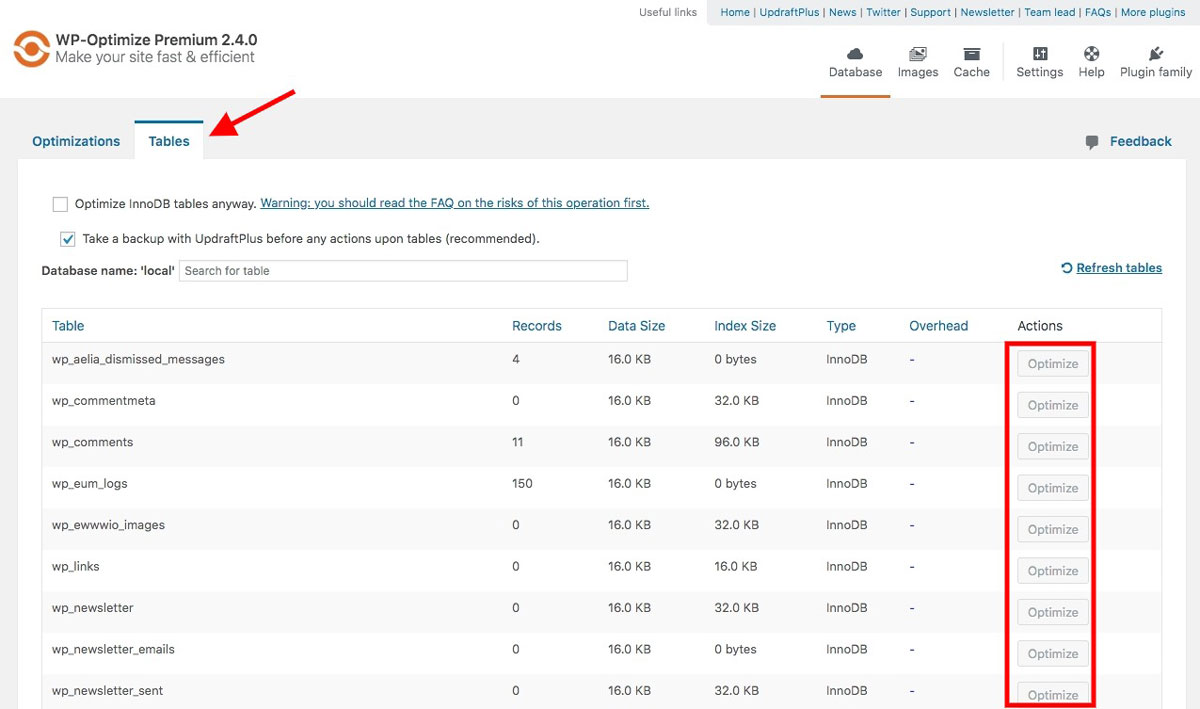
- Use the database Optimize feature of the plugin to De-fragment/Compact all your MySQL tables
- Watch out for massive data consuming plugins that store a lot of traffic data like (Anti-Spam plugins, Security plugins, Statistic plugins)
- Delete images that are not used with Media Cleaner (each image format created writes a new set of data on the database)
Just to give you a quick idea of how quickly the size can escalate to increase your WordPress database size.
Let’s talk about Post revisions, if no limit is specified for the post revisions, well for each post you create and modify it can have 5 revisions or more. So assume that you have 100 articles, so that equals to 500 revisions. That’s A LOT!!!
When you delete plugins, the files are deleted but its tables in the database are not removed. And this is why you need WP-Optimize plugin. It cleans all your database from unnecessary data with one click.
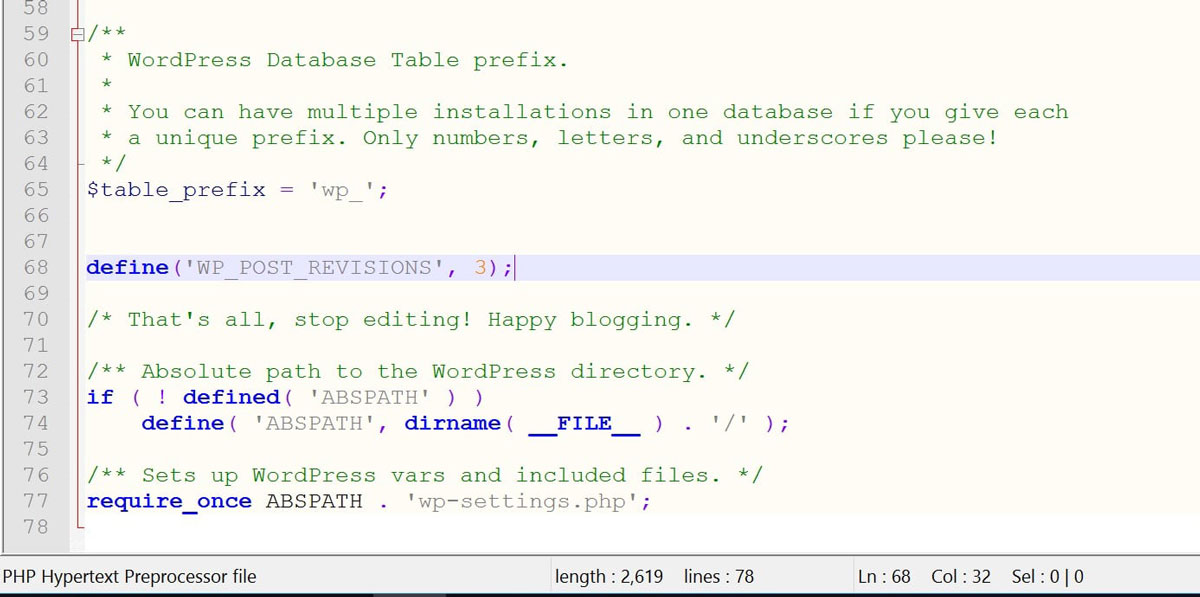
- For limit your post revision to 2 per post, add: define(‘WP_POST_REVISIONS’, 2);
- To prevent WordPress from storing post revision, add: define(‘WP_POST_REVISIONS’, false);
Step 6: Use external JS files (optional)
To optimize your disk space even further, in case you’re not doing it already if you find that your JS files sizes are big, you can choose to load them externally.
For example, if you wish to load your jQuery file, inside your theme’s files, instead of having the actual JS file on your server, you can use the online library simply by changing the URL path to the file from:
https://your-domain.com/wp-content/themes/js/jquery.js
To
https://ajax.googleapis.com/ajax/libs/jquery/3.4.1/jquery.min.js
You can apply the same concept to other JS files as well.
Part 3: How to prevent this from happening again
For those of you who use a VPS server, you can follow these 3 steps:
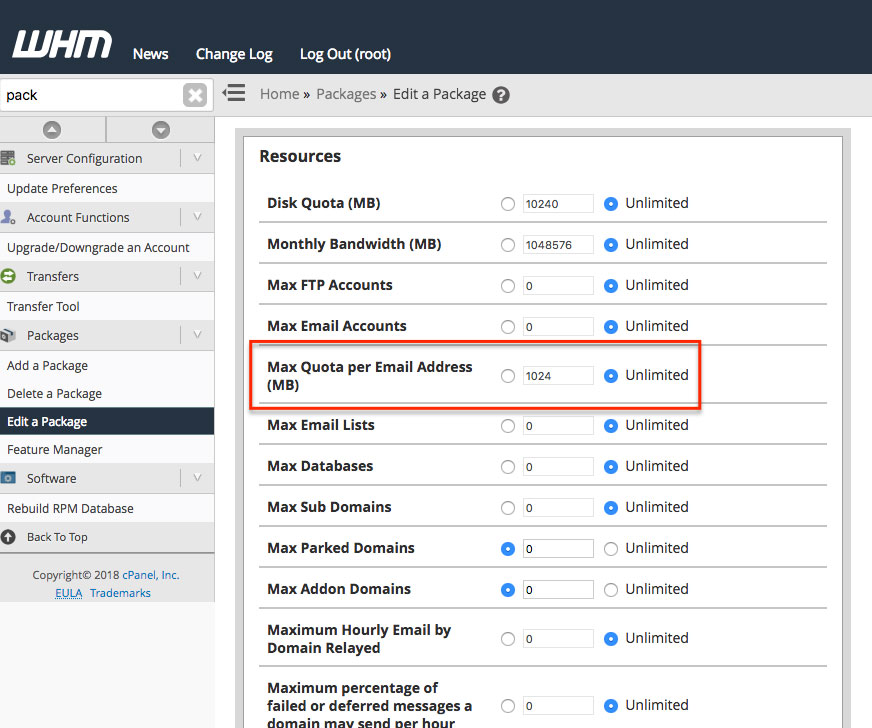
Step 1: Change WHM quota for your account
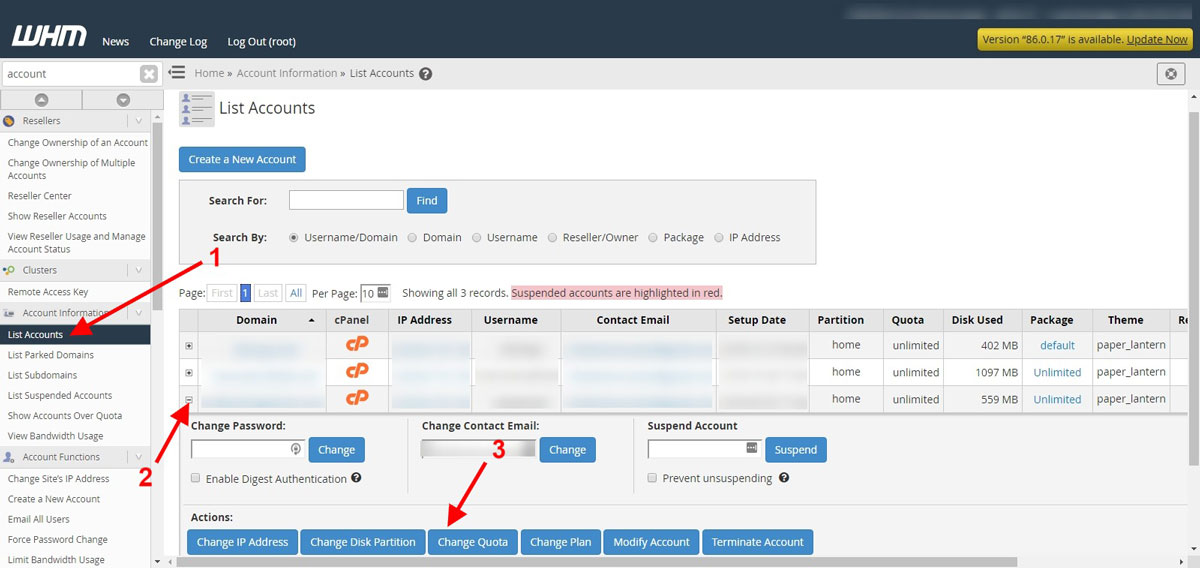
Connect first to your WHM account, afterward, click on List Accounts, then select the account to which you want to change the disk quota.
Another way to do this:
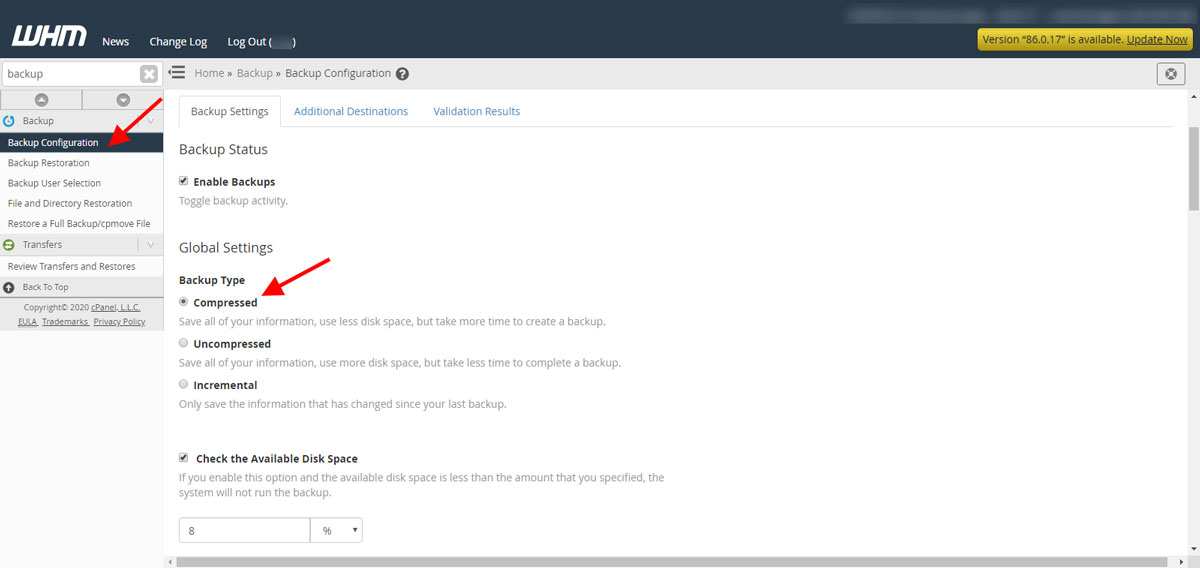
Step 2: Keep the backups to the minimum
Next, we are going to change our backup configure to help us optimize our disk space.
Go to Backup Configuration and then make sure the backup type is selected as Compressed.
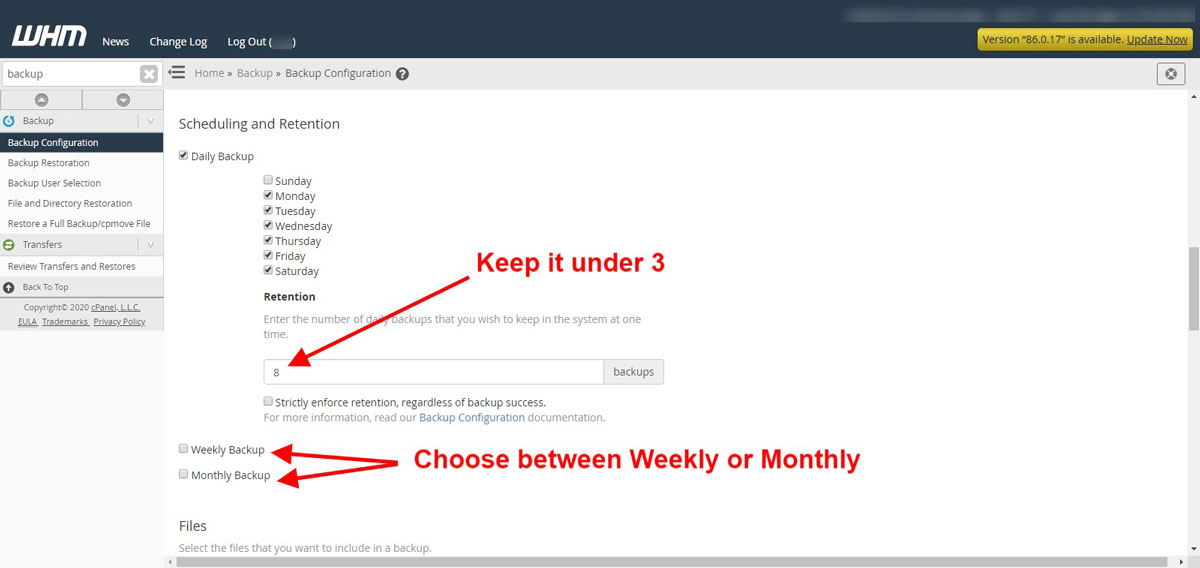
After that, on the same page, keep scrolling down to “Scheduling and Retention”. Then, change your scheduling backups from Daily to Weekly. And then change your retention number of backups to an absolute minimum number you feel comfortable with.
The lower the number is, the more space you will have in your cPanel disk space.
Step 3: Add new backup destination for WHM backups
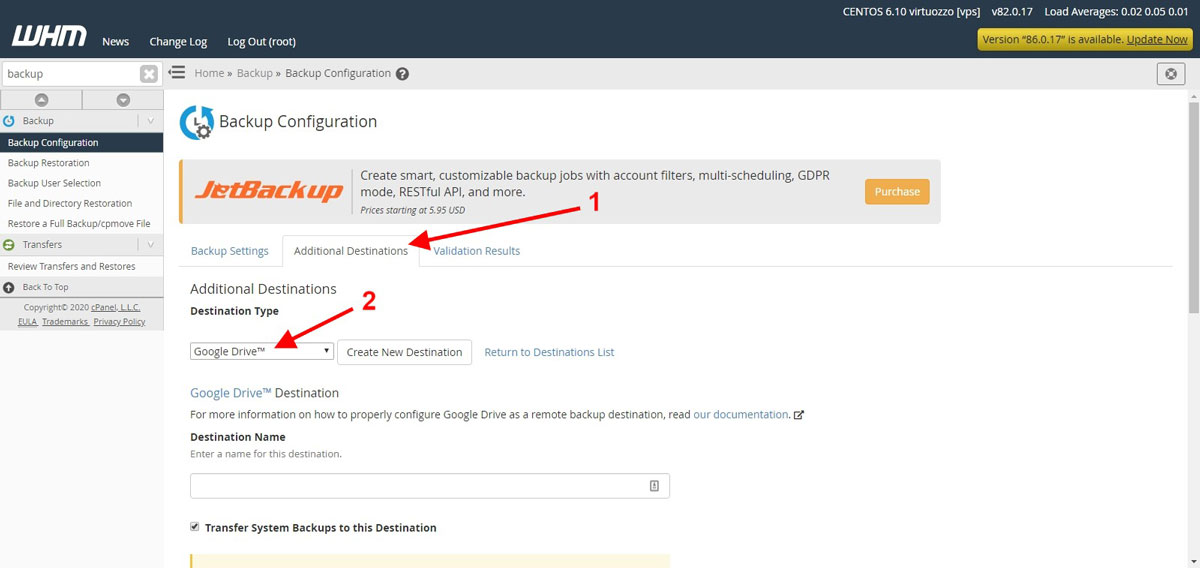
A great way to save the most of your cPanel disk usage is to activate the cPanel backup to Google Drive.
Basically, you just add Google Drive as a remote storage location for your WHM backups.
To do it, go to Backup Configuration >> Additional Destinations >> Destination Type >> Google Drive.
Scroll down to enter your API credentials (client ID and client secret key).
1. Limit the maximum upload file size by adding the following lines of codes inside the wp-config.php file.
- @ini_set( ‘upload_max_size’ , ’64M’ );
- @ini_set( ‘post_max_size’, ’64M’);
- @ini_set( ‘max_execution_time’, ‘300’ );
2. Prevent image resizing. This is important because WordPress generates 3 different image sizes for each image you upload. And 9 out of 10, you use 1 size for each image. If you would like to know more about how to do it properly, here is a full tutorial about it.
Your website may have outgrown your hosting plan
After applying all the previous steps, if you still think that it wasn’t enough to free enough disk space for you. Then it is time to consider upgrading or moving to a new hosting provider.
We recommend Bluehost for this particular subject, because their hosting plans include UNLIMITED SSD disk space, and Unlimited bandwidth. So, you wouldn’t need to worry anymore about hitting the limits of your cPanel disk space or if your bandwidth is enough for your site’s traffic.
- Bluehost is Officially recommended by WordPress.org
- Unlimited Disk Space & Bandwidth
- Free Domain name
- Multiple Data centers locations
- Free SSL certificate
- Beginner Friendly
- Affordable Price with a Money-back guarantee
Conclusion
Keep in mind that if you managed to free some disk space today, and you still don’t have that much left. Then, in that case, think about the near future, as your average size of WordPress site will naturally keep on growing with newly added content.
In that case, do not wait until you reach the most critical point. It is best to act now by moving to a more stable and lasting web hosting solution to be safe.
That’s it! We hope our guide was helpful to you!
If this guide helped you or If you have any questions, feel free to leave us your precious comment 🙂